Round filters are currently enjoying a resurgence in popularity. Compared to square filter systems, they are a compact and lightweight alternative that will fit into almost any pocket. So if you prefer to travel with a minimal photography kit, investing in round filters is well worth considering.
I myself go back a long way with screw-in filters, having used them since my analogue photography days. Back then, I mainly carried UV and polarising filters in my camera bag, with the most important ND filters joining the kit a little later. A few years after switching to a square filter system, however, I came to the conclusion that rectangular filters alone are not the whole answer. They do not cover every application, and in my view, every well-rounded filter kit should also include a set of round filters.
But which filters are actually worth buying, and which products are currently less advisable? The range on offer is large and, at times, rather confusing. Time and again I come across recommendations on social media that are poorly founded and hard to understand. All too often, a purely subjective user opinion is presented as the best option, or second-hand hearsay is simply passed on uncritically.
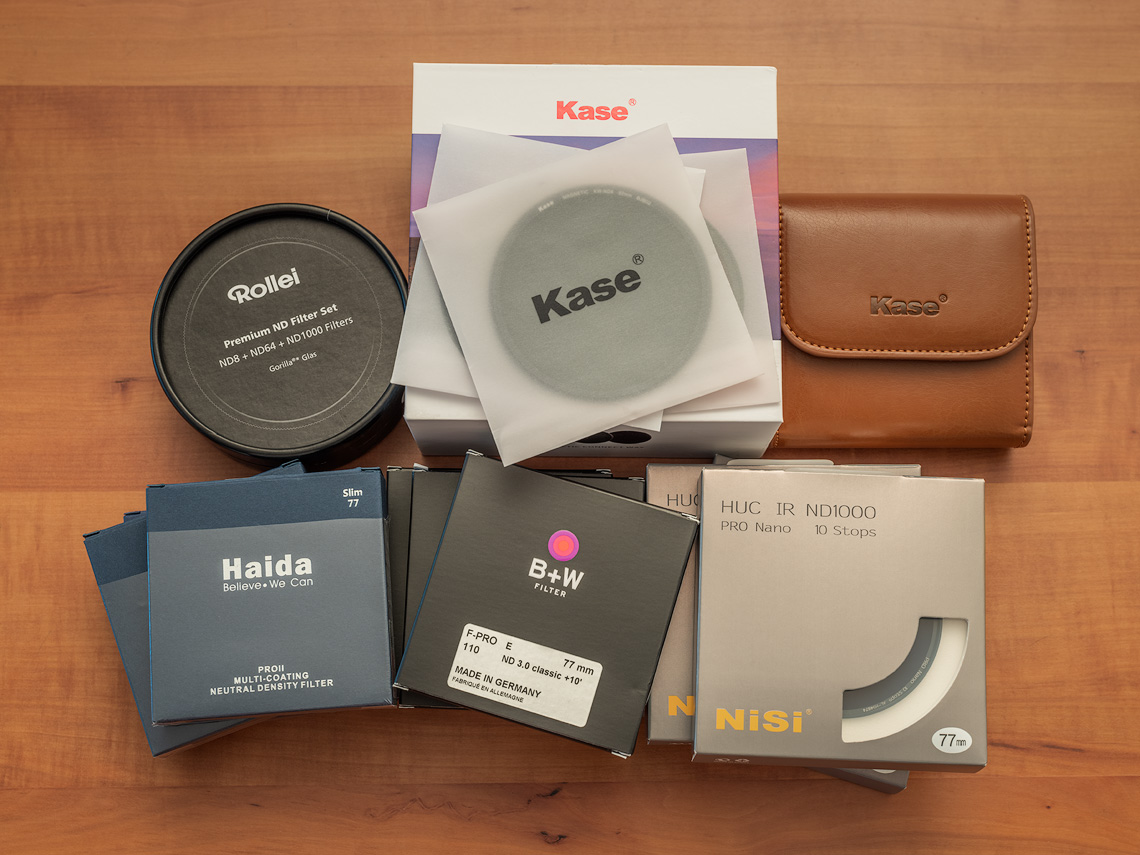
For this blog post, I took the time to shed some light on this segment of the filter market. When selecting the test candidates, I limited myself to the five manufacturers that are most frequently mentioned in online buying advice and that keep appearing in discussions. From each of these brands, I purchased the standard strengths of 0.9 (8x), 1.8 (64x) and 3.0 (1000x). All test products were bought through regular retail channels—meaning no hand-picked samples supplied by the manufacturers specifically to perform well in reviews.
Manufacturer No. 1: Schneider Kreuznach
The manufacturer behind B+W filters, the Schneider Group, is a German company group that has been producing high-performance lenses and filter systems for the industrial, cinema and photographic sectors for many years. This makes B+W Schneider Kreuznach screw-in filters the classic premium option among the candidates in this test. I myself first ventured into long-exposure photography many years ago using B+W filters, and to this day products from Bad Kreuznach still enjoy an excellent reputation among experienced photographers.
The following three B+W ND Filters took part in the test:
- B+W 1089183 ND8 77mm MRC Nano XS-Pro 8x Coated Slim Premium
- B+W 1089230 ND64 77mm MRC Nano XS-Pro 64x Coated Slim Premium
- B+W ND1000 77mm E, F-Pro multi coated Professional
Manufacturer No. 2: Haida
There are probably few photography enthusiasts who have never heard of Haida. The optical filters of the Chinese manufacturer—whose full name is Ningbo Haida Photo Supplies—are widely known and popular among photographers. Founded in 2007 in Ningbo, the brand has built its reputation on offering good colour neutrality at a reasonable price, which makes its products particularly attractive to budget-conscious photographers.
For this test, I used the Haida Slim Pro II Digital MC Neutral ND Filter Set, including the Stack Cap Filter Container and Pro Lens Cap with inner grip, comprising the following filters:
- Haida Slim Pro II MC ND 0.9 8x
- Haida Slim Pro II MC ND 1.8 64x
- Haida Slim Pro II MC ND 3.0 1000x
Manufacturer No. 3: Kase
Kase Filters is the youngest brand among the manufacturers in this test and, in a sense, a relative newcomer to the premium filter market. Its innovative products have been developed in China since 2011, partly in cooperation with German partners, and have been available on the German market for around three years. Kase holds a number of innovative patents, including its magnetic mounting system, which is also featured in the round filter kit tested here. Product quality and innovation are key principles of this high-end manufacturer from Guangdong, and not least because of this, Kase has already received numerous international quality certifications for its products.
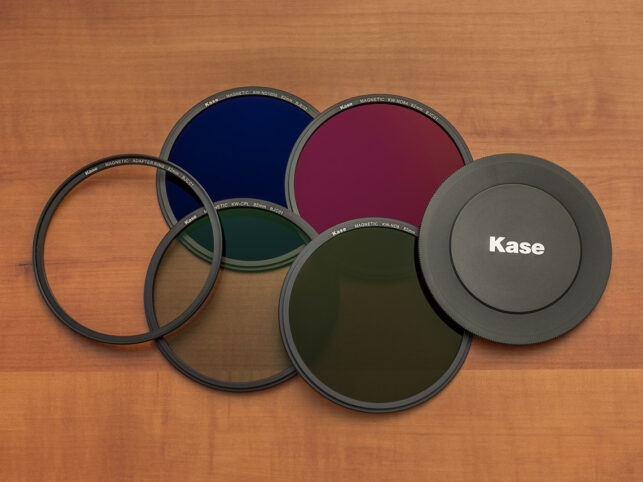
The product tested here was the Kase ROUND Wolverine Magnetic Round Filter ND Kit:
- Kase Magnetic KW-CPL
- Kase Magnetic KW-ND8
- Kase Magnetic KW-ND64
- Kase Magnetic KW-ND1000
Manufacturer No. 4:NiSi
NiSi filters are among the most widely used optical filters on the German market. In addition to other photographic accessories, they have been developed and manufactured in Zhuhai, China, since 2005. In Germany, NiSi filters have been available via Amazon since 2007 and, for the past year, also through NiSi Optics Germany. I had already used this manufacturer’s square ND filters in the past, so I was confident that its screw-in filters would also perform well.
The following three ND filters from the Pro Nano series took part in the test:
- NiSi ND8 Pro Nano HUC IR Slim
- NiSi ND64 Pro Nano HUC IR Slim
- NiSi ND1000 Pro Nano HUC IR Slim
Manufacturer No. 5: Rollei
Rollei is undoubtedly one of the great names in German photographic history. Who has not heard of the legendary Rolleiflex? I was particularly curious to see the test results from this candidate. Although I had not previously used Rollei filters myself, I was of course familiar with the company’s eventful 100-year history.
During my research, I came across a German article on Digitalkamera.de stating that the Rollei name is no longer directly connected to the former Braunschweig-based powerhouse of the photographic industry. According to the article, the current owner of the trademark rights, RCP-Technik GmbH & Co. KG (renamed Rollei GmbH & Co. KG in 2015), uses the traditional Rollei brand name for OEM products manufactured with components from East Asian development and production companies in the digital imaging sector. That surprised me, which is why I contacted Rollei’s press office directly. According to the response I received from the product manager, the filters are manufactured in Asia to specifications defined in Germany and are subject to strict requirements and quality control procedures, both during production and upon arrival at the company’s German warehouse. Rollei screw-in filters have been available in Germany since March 2016 and have since undergone further optimisation.
The Rollei product included in this test was the Rollei Premium ND Filter Set, made of Gorilla Glass and supplied with an aluminium protective cover, consisting of the following filters:
- Rollei Premium ND8
- Rollei Premium ND64
- Rollei Premium ND1000
Evaluation Criteria
Filters can be subjected to countless different tests. Some of them, however, may damage the product itself—for example scratch or impact tests—while others, such as infrared transmission measurements or advanced resolution testing, require expensive optical laboratory equipment. For my own tests, I relied on measuring instruments available to me and on methods that can also be reproduced at home.
In particular, I was interested in two aspects of the filters under review: colour fidelity and the accuracy of the stated filter factor. Over the years, I have learned one thing above all: there are only very few ND filters on the market that are truly neutral, and the filter factors printed on them often seem to be little more than approximate values. In many cases, the claimed values were simply not achieved in practice.
Test Setup at a Glance
The central tools used for the measurements were, naturally, my current camera and existing equipment: a Fujifilm GFX 50S medium-format camera with Fujinon GF lenses, used in combination with an X-Rite ColorChecker Passport. To obtain results that were as objective and reliable as possible, I also set up a test environment designed to minimise external influences and provide sufficiently stable lighting conditions for the measurements.
- Room: no daylight
- Light source: Philips TL-D 90 Graphica 85W/950
- Test chart: X-Rite ColorChecker Passport
- Camera: Fujifilm GFX 50S
- Lens: Fujinon GF 32–64mm at 64mm
- White balance: manual, 5000K
- Aperture: f/5.6
- ISO speed: ISO 100

Additional Test Setups
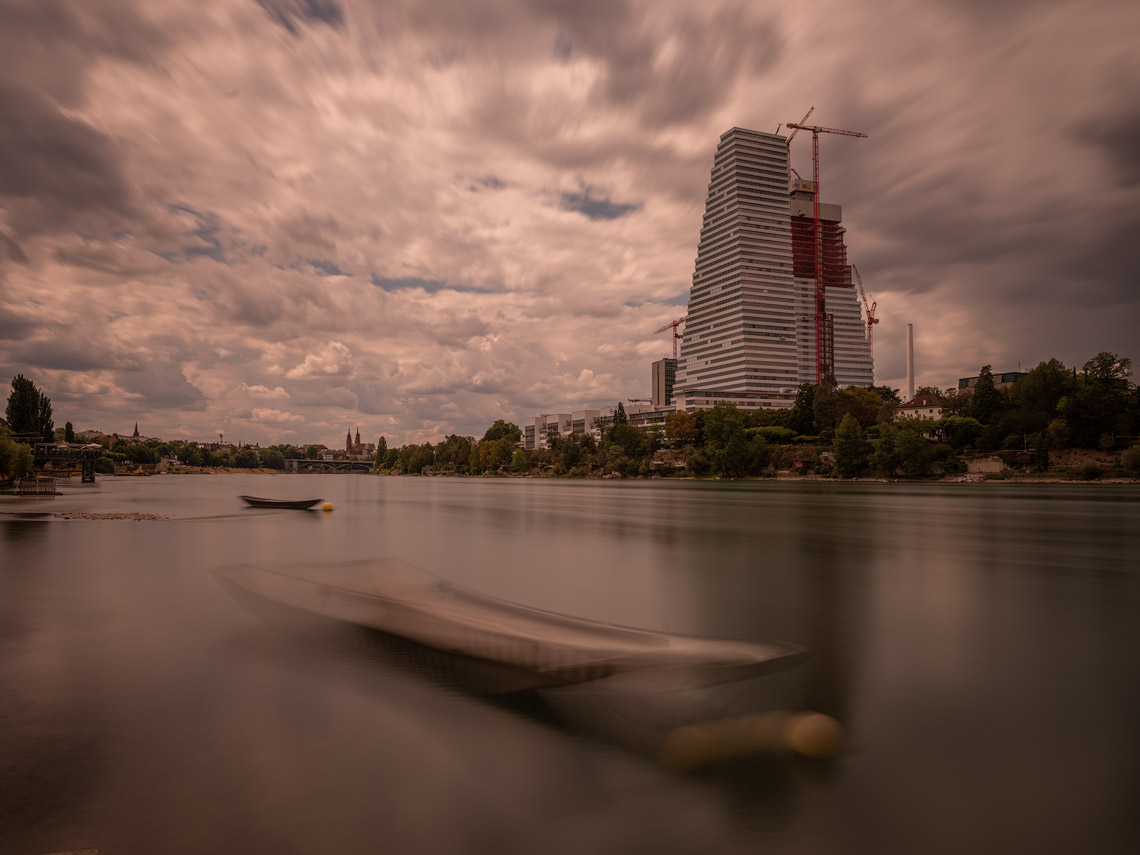
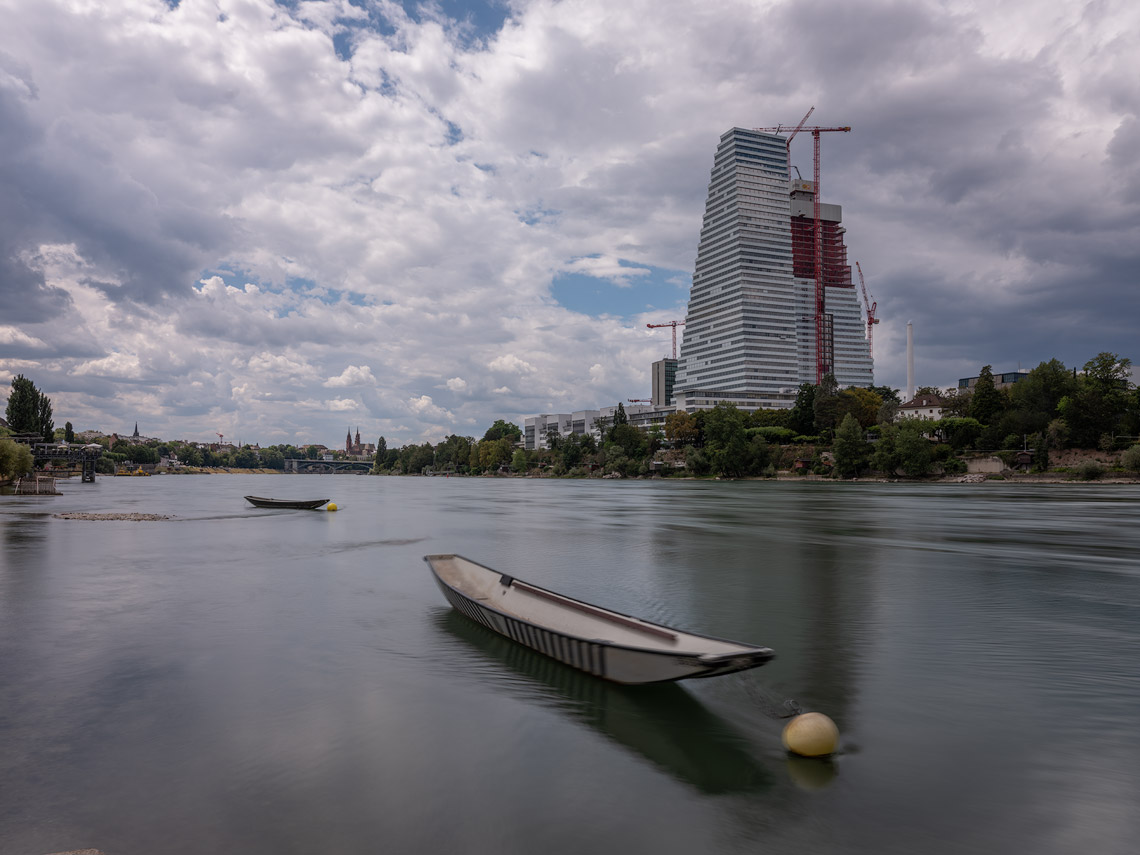
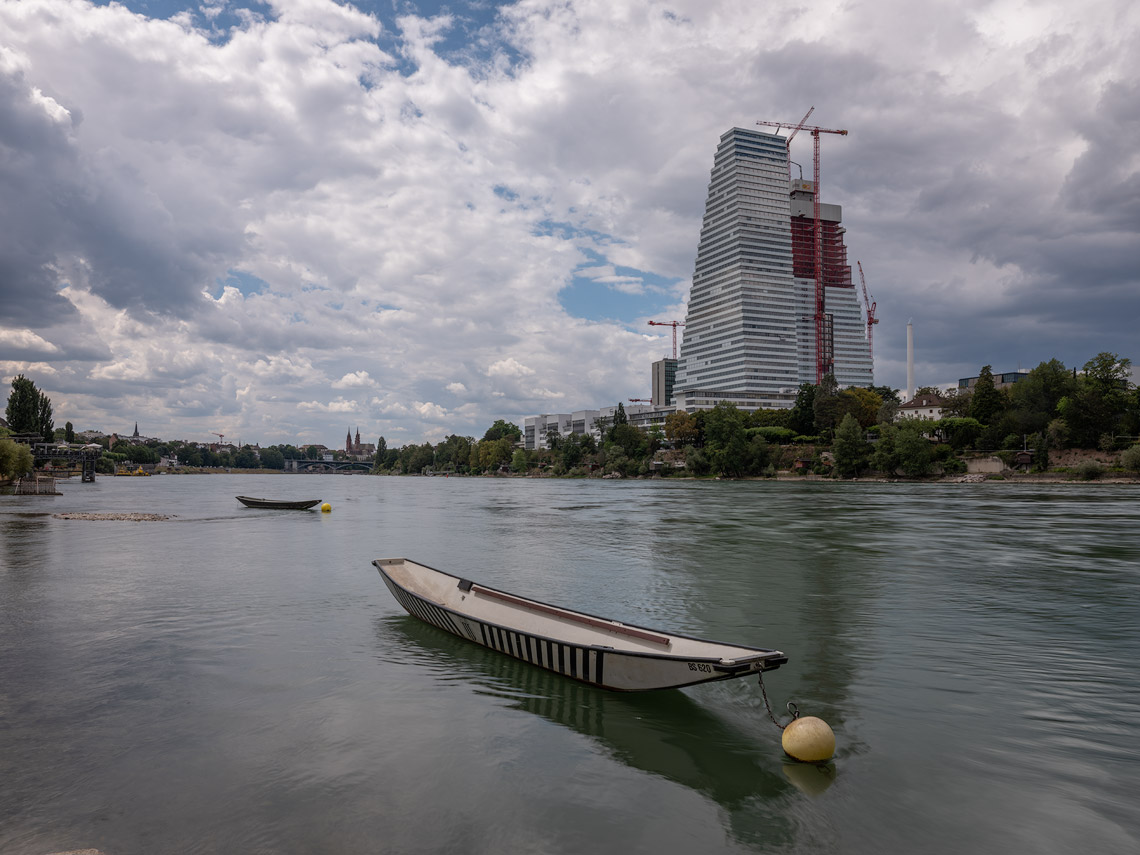
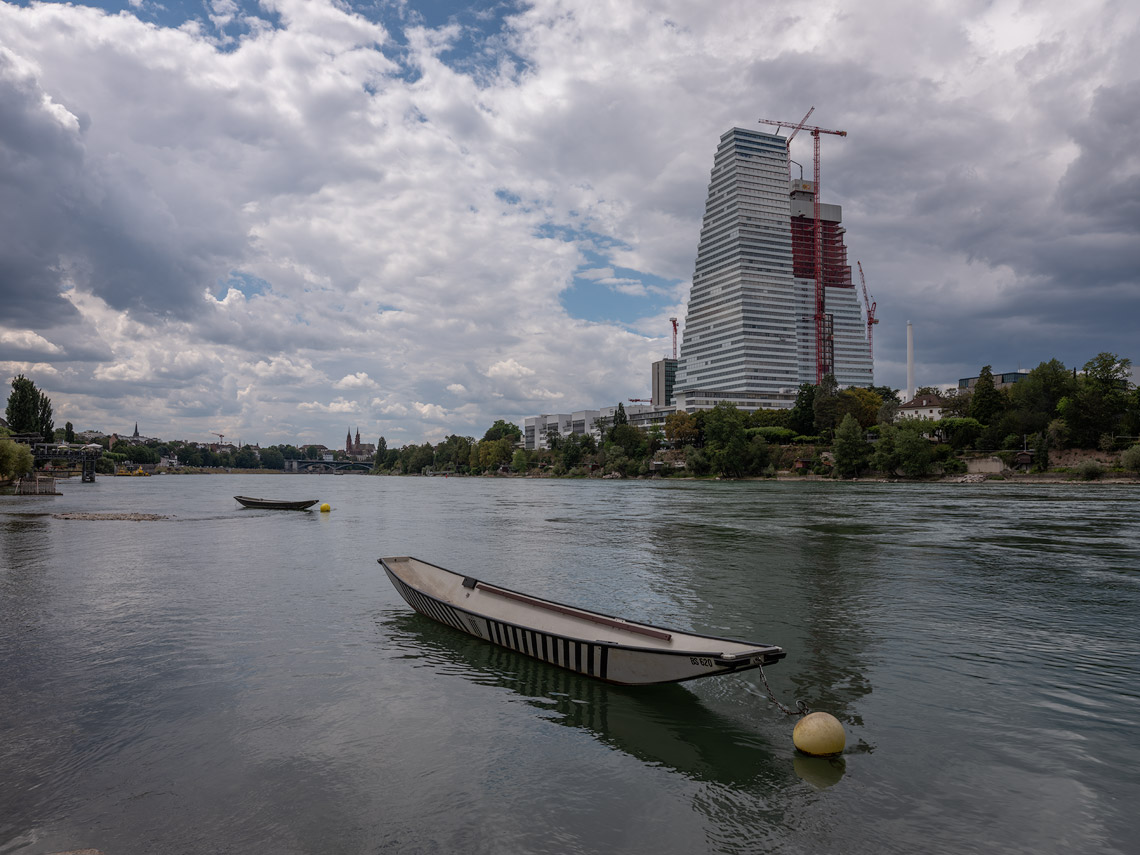
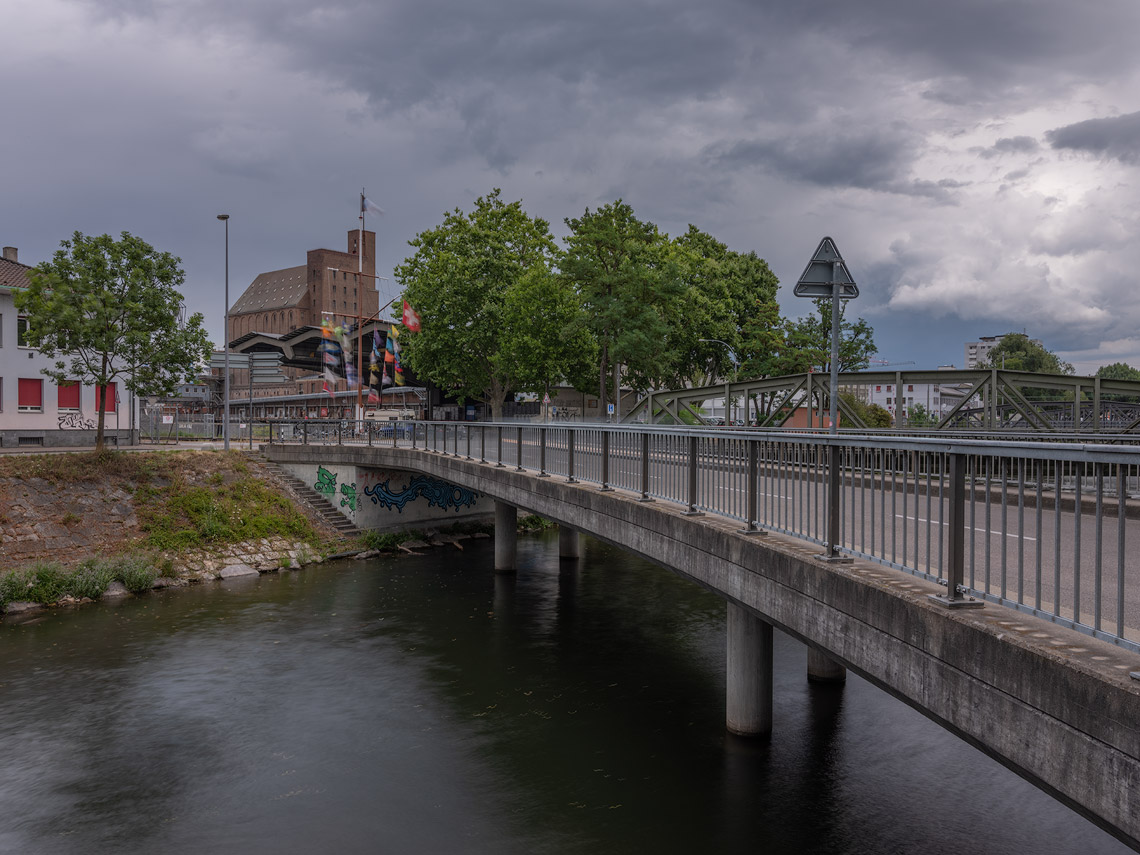
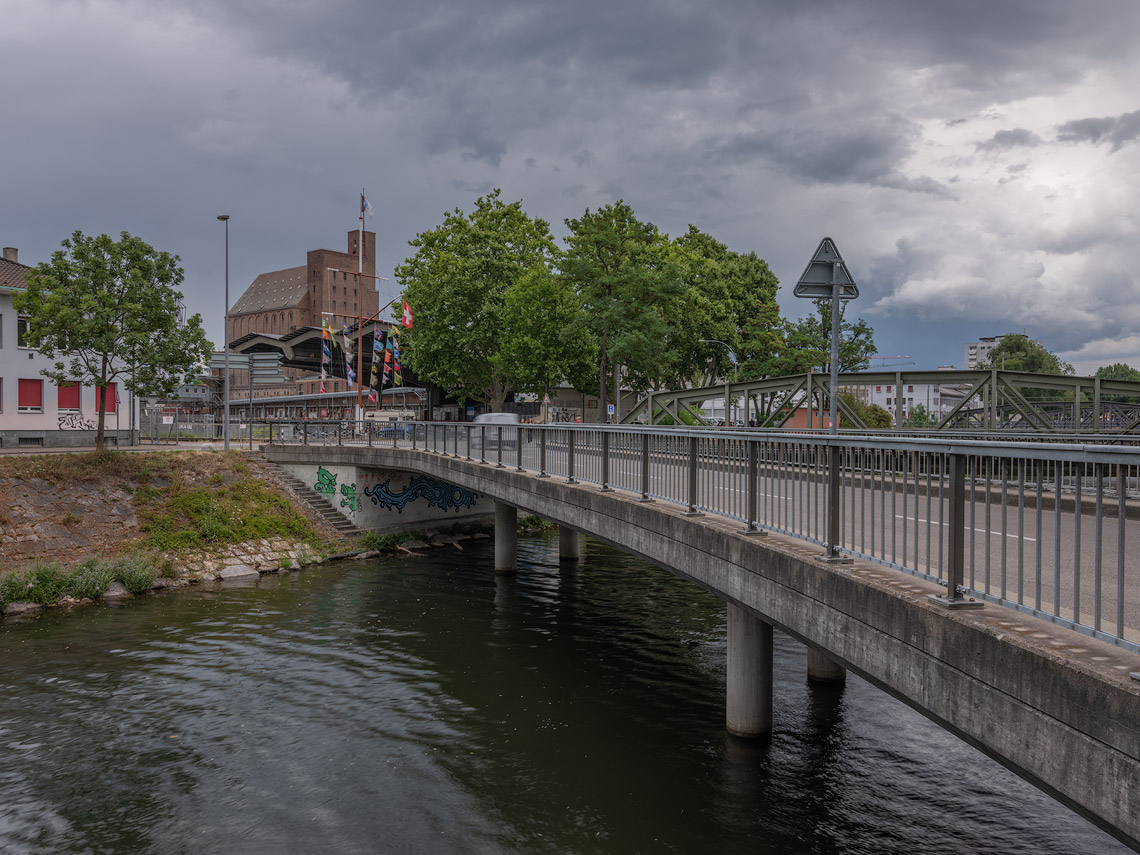
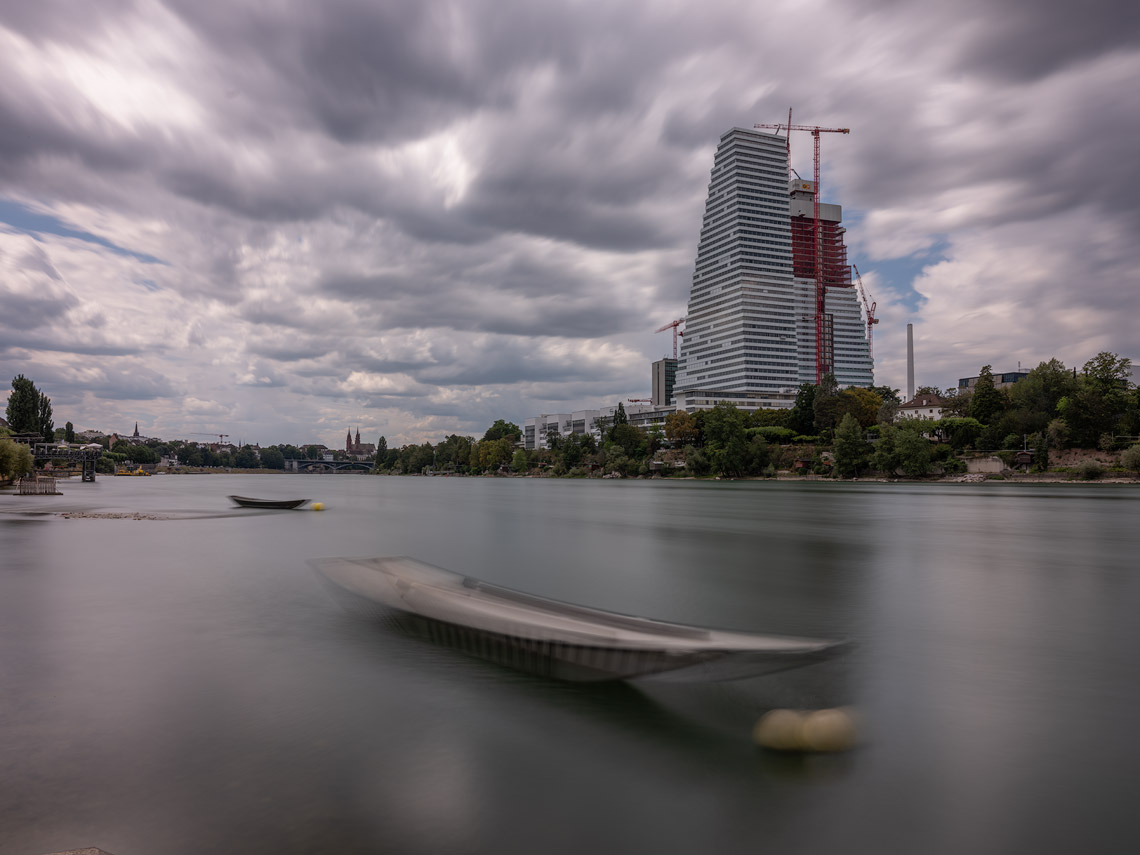
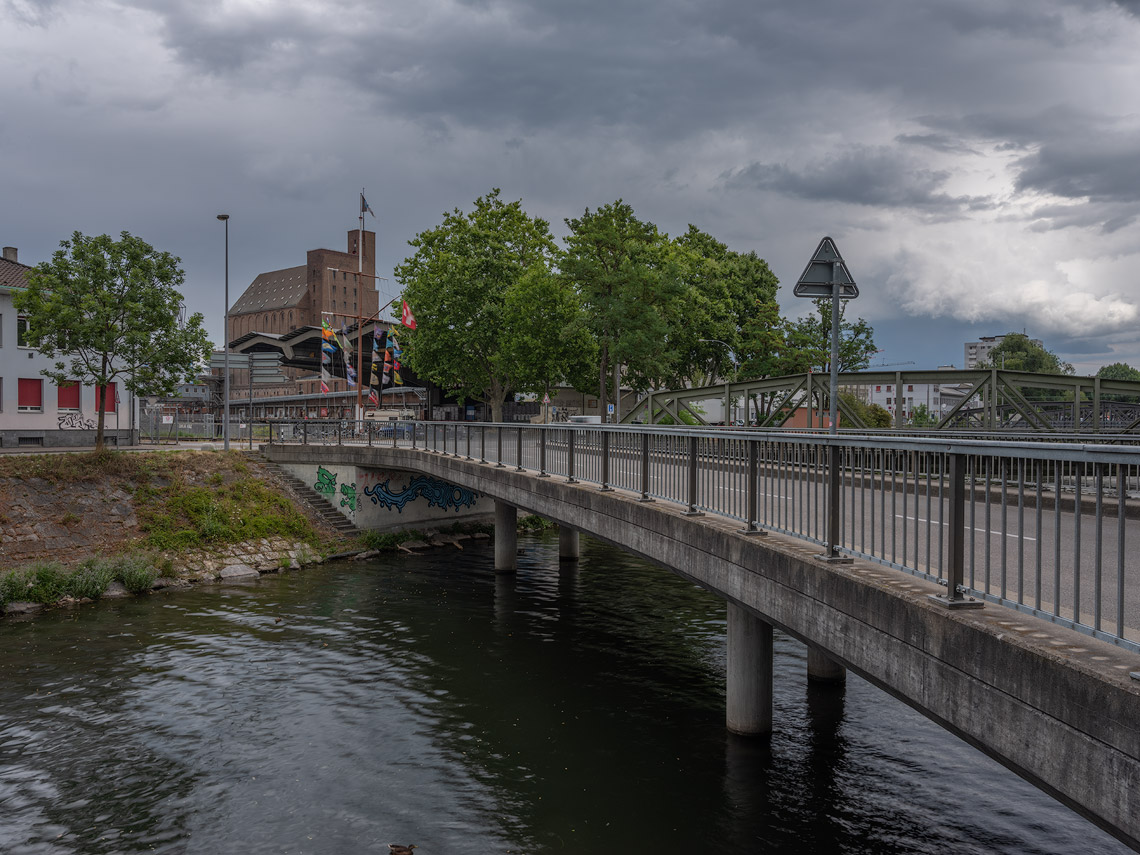
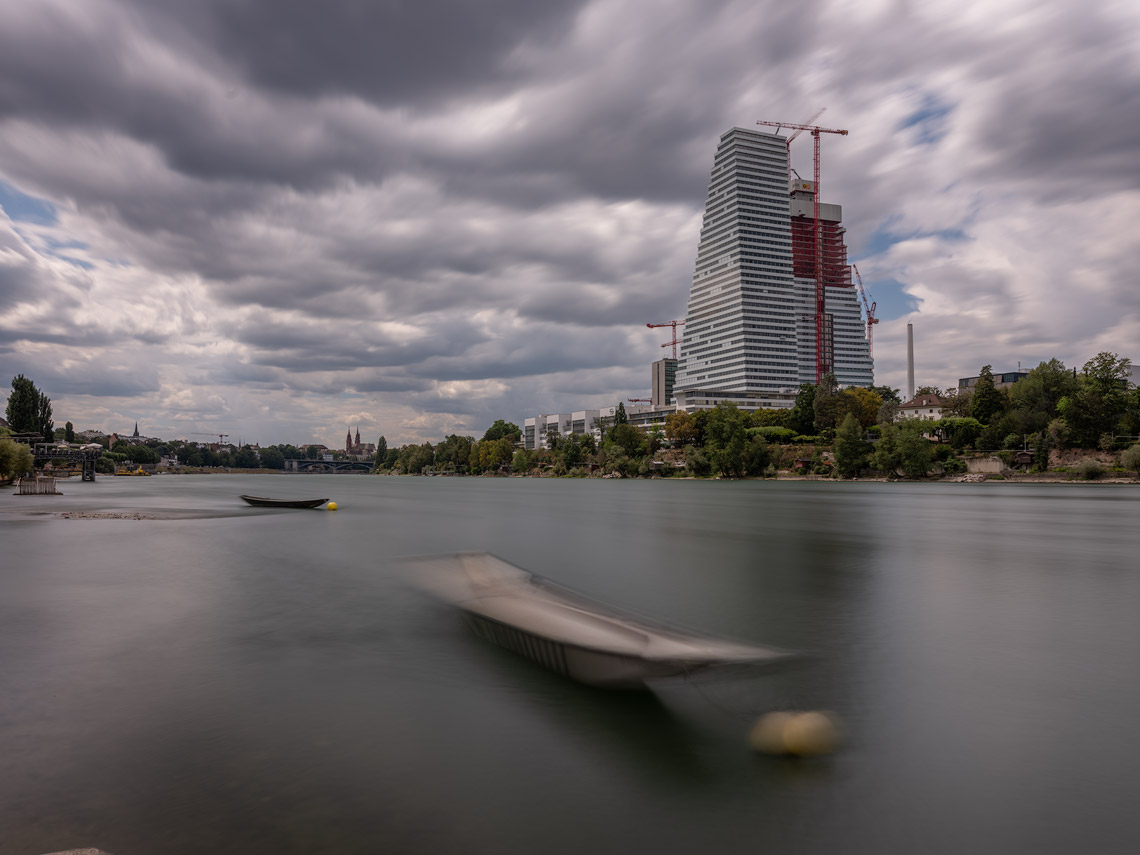
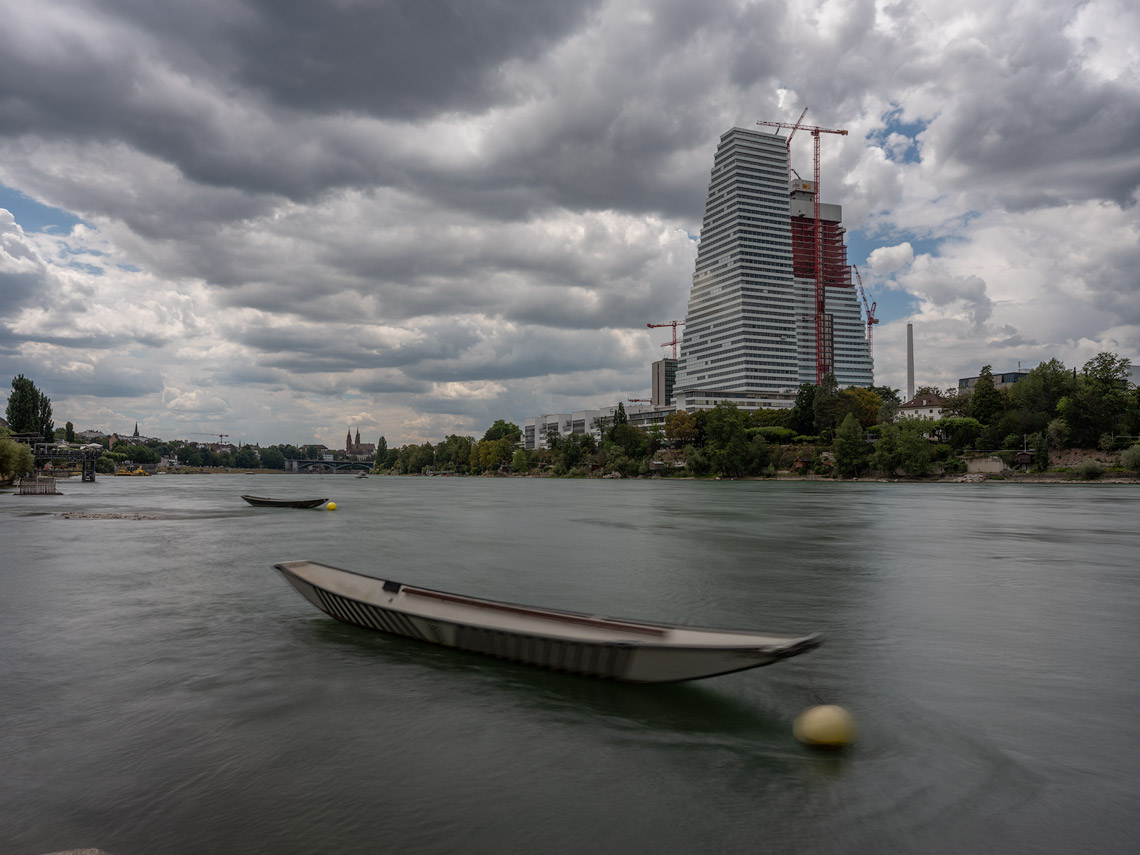
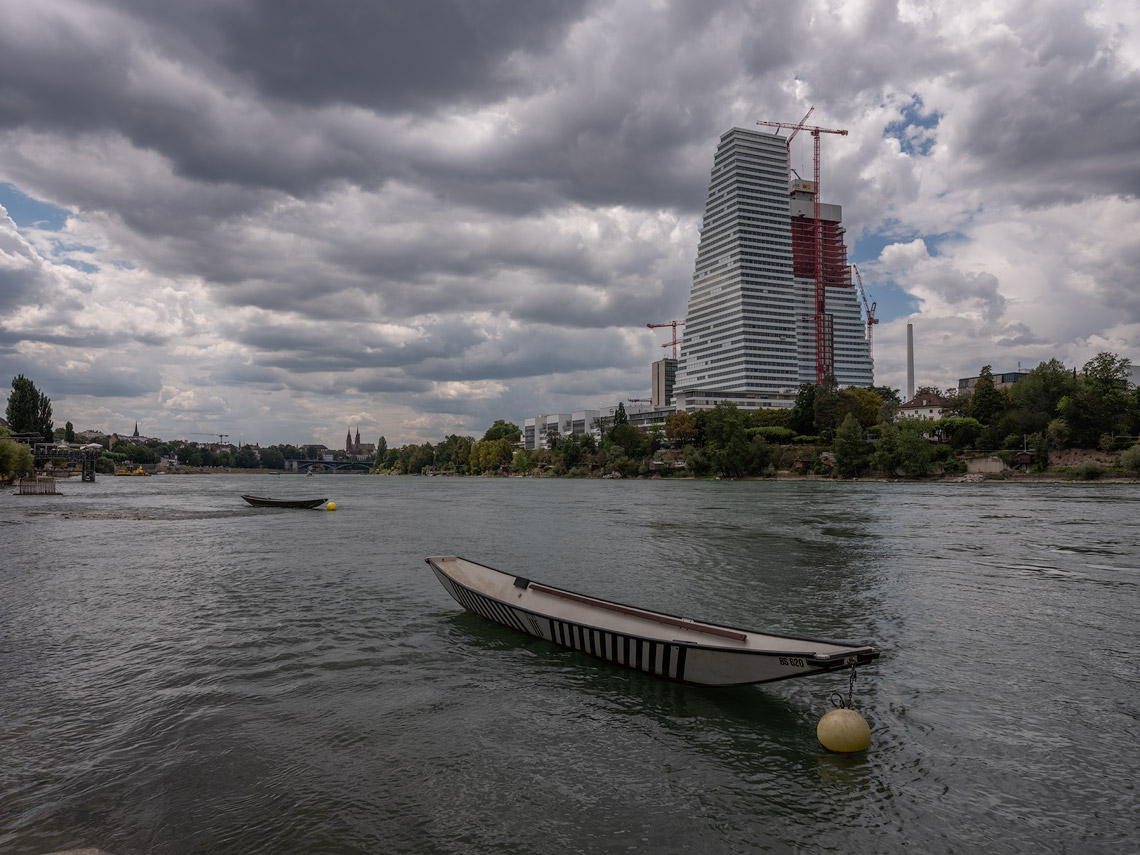
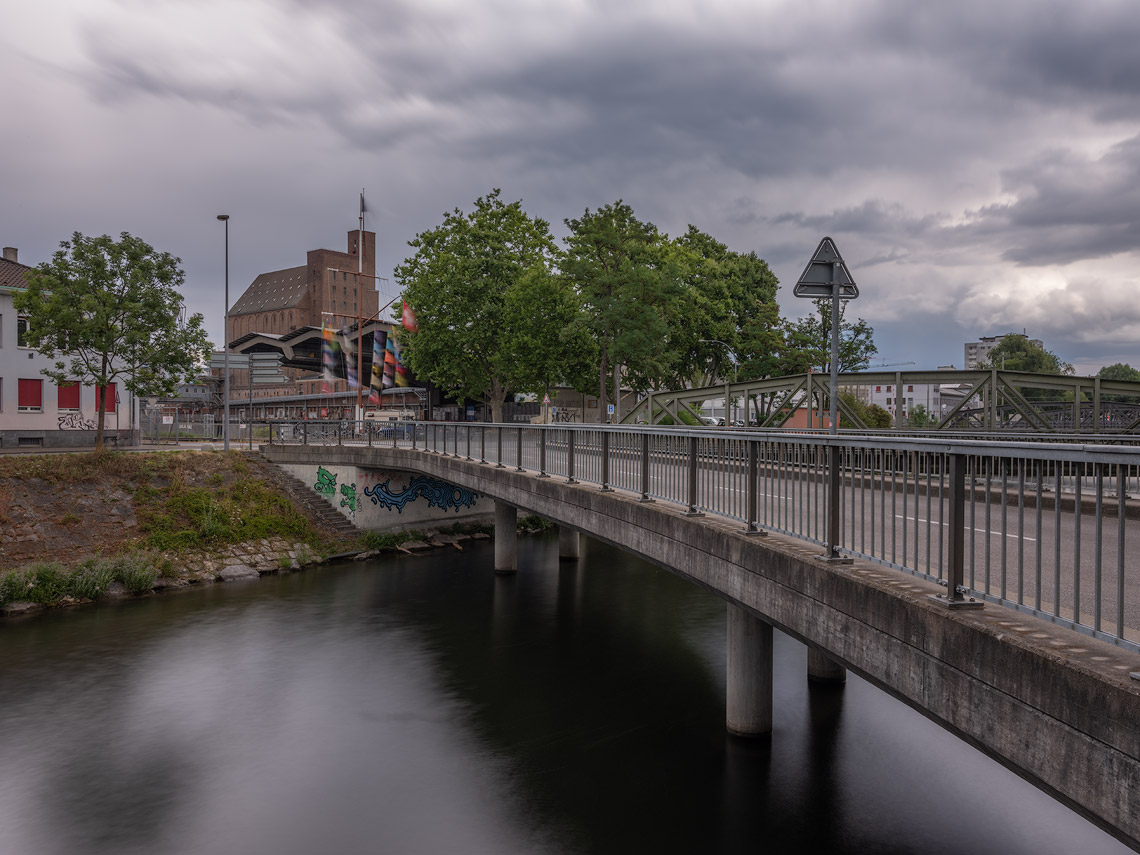
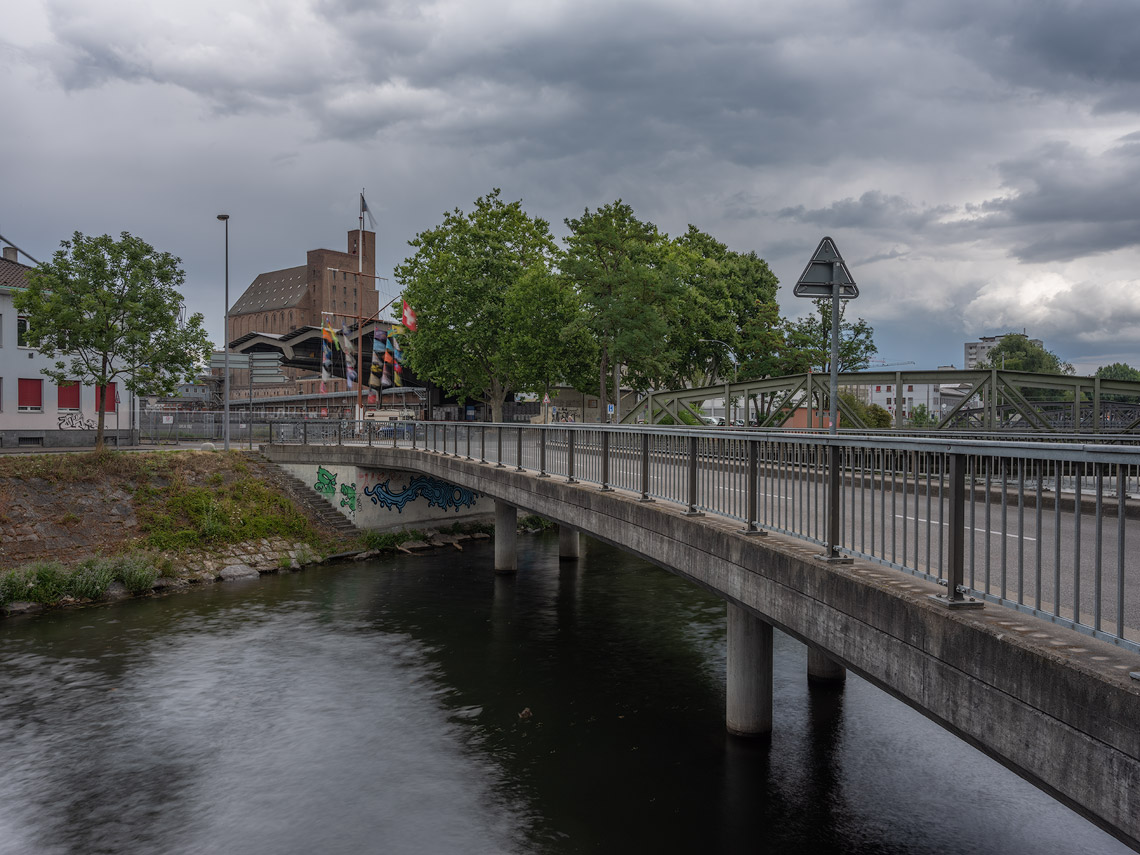
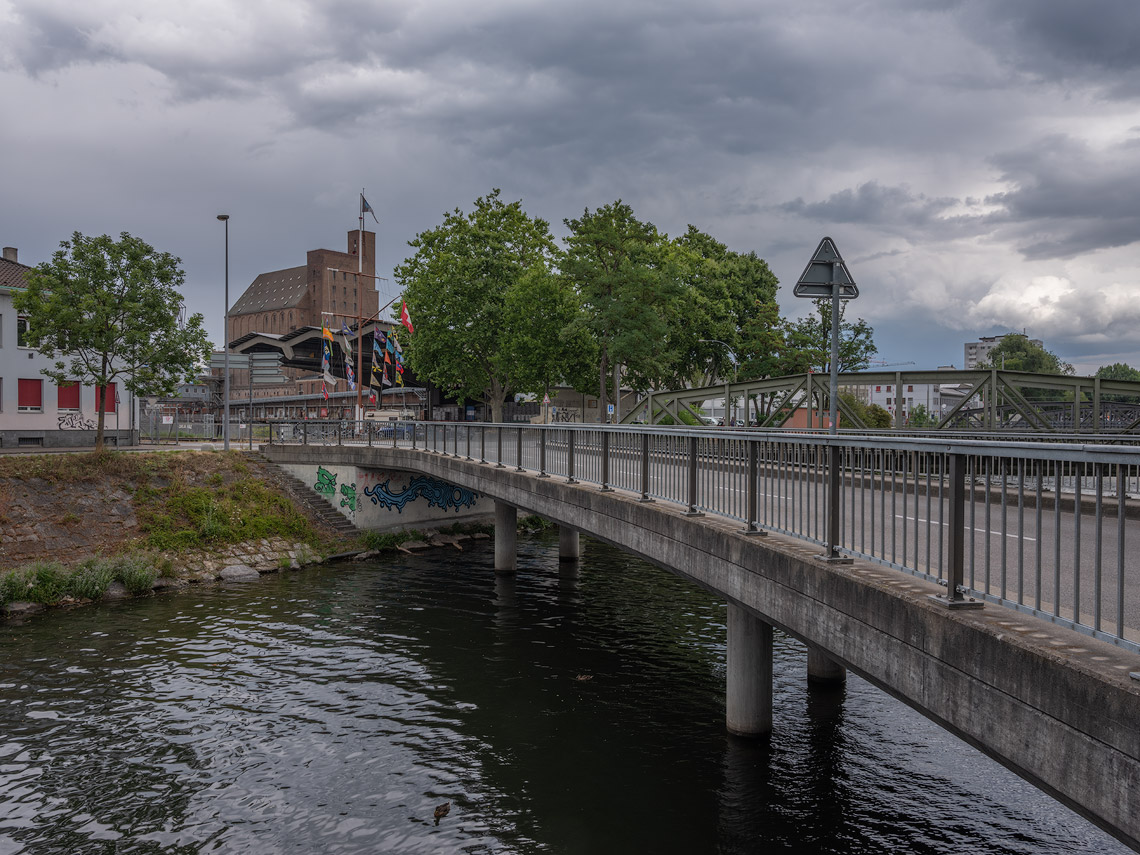
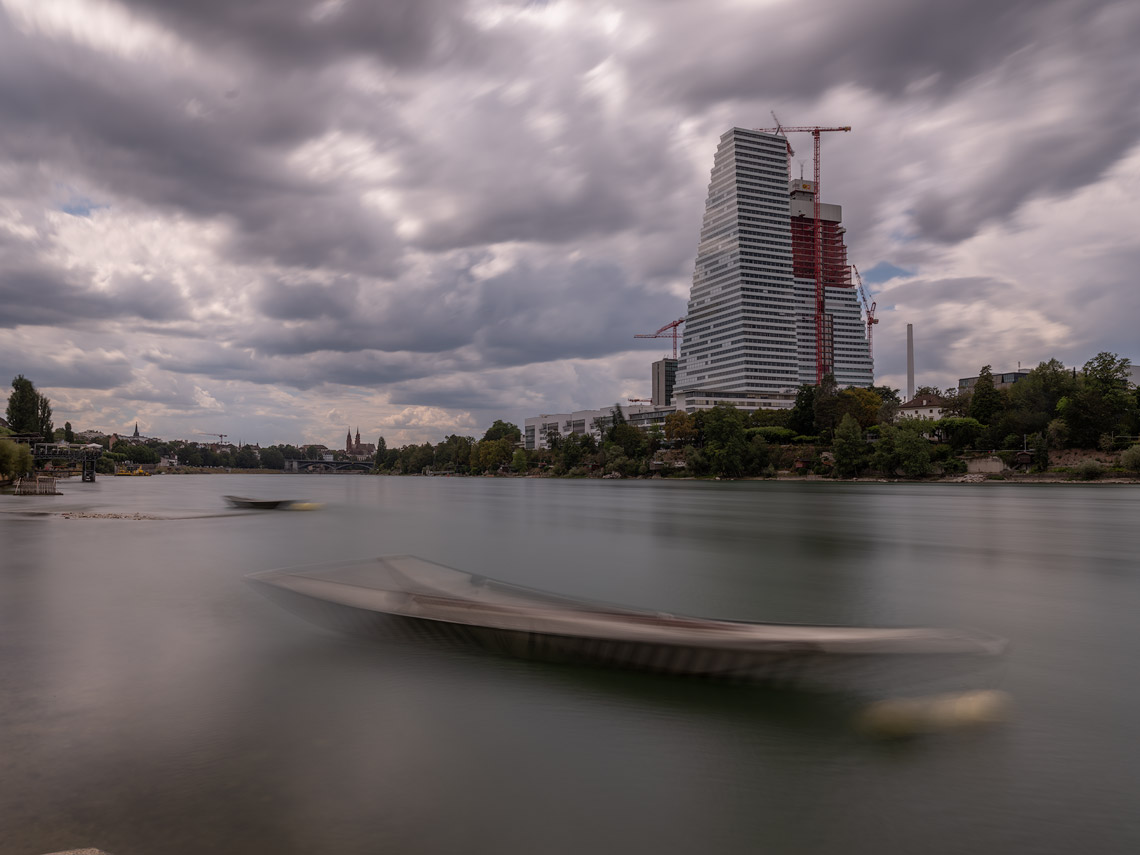
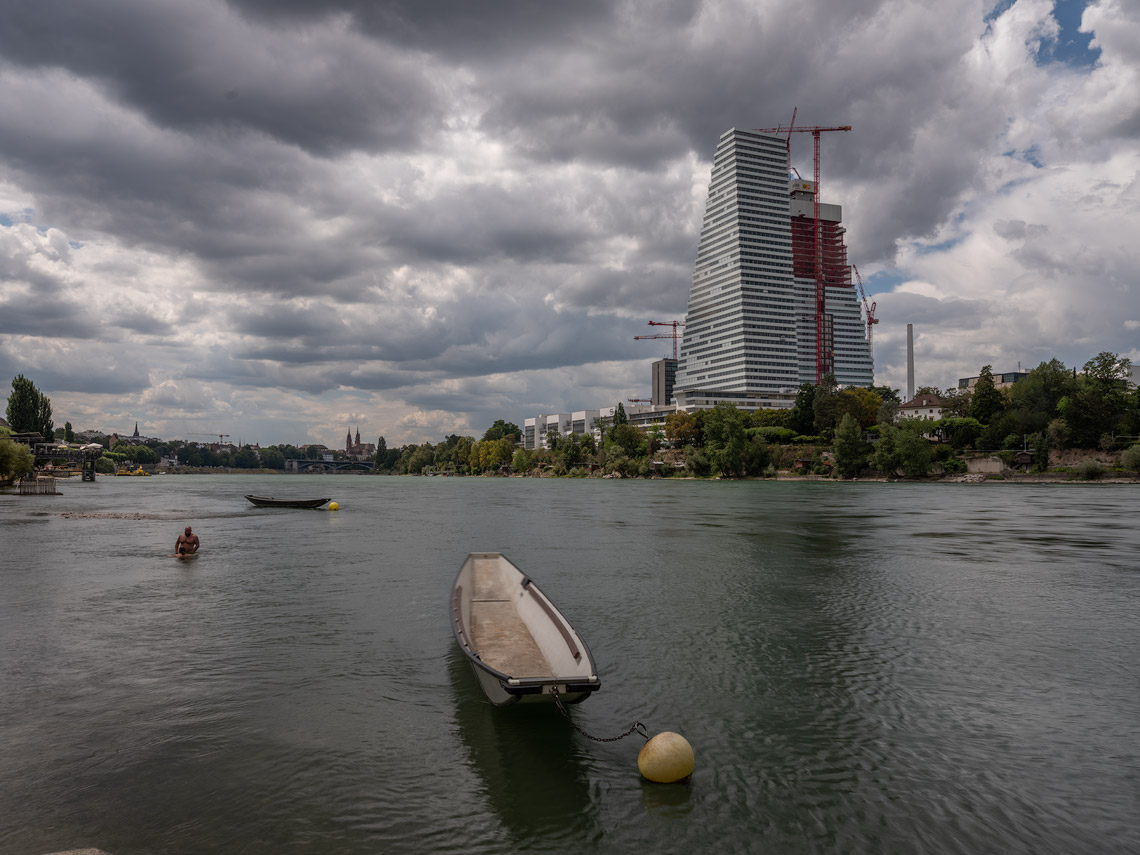
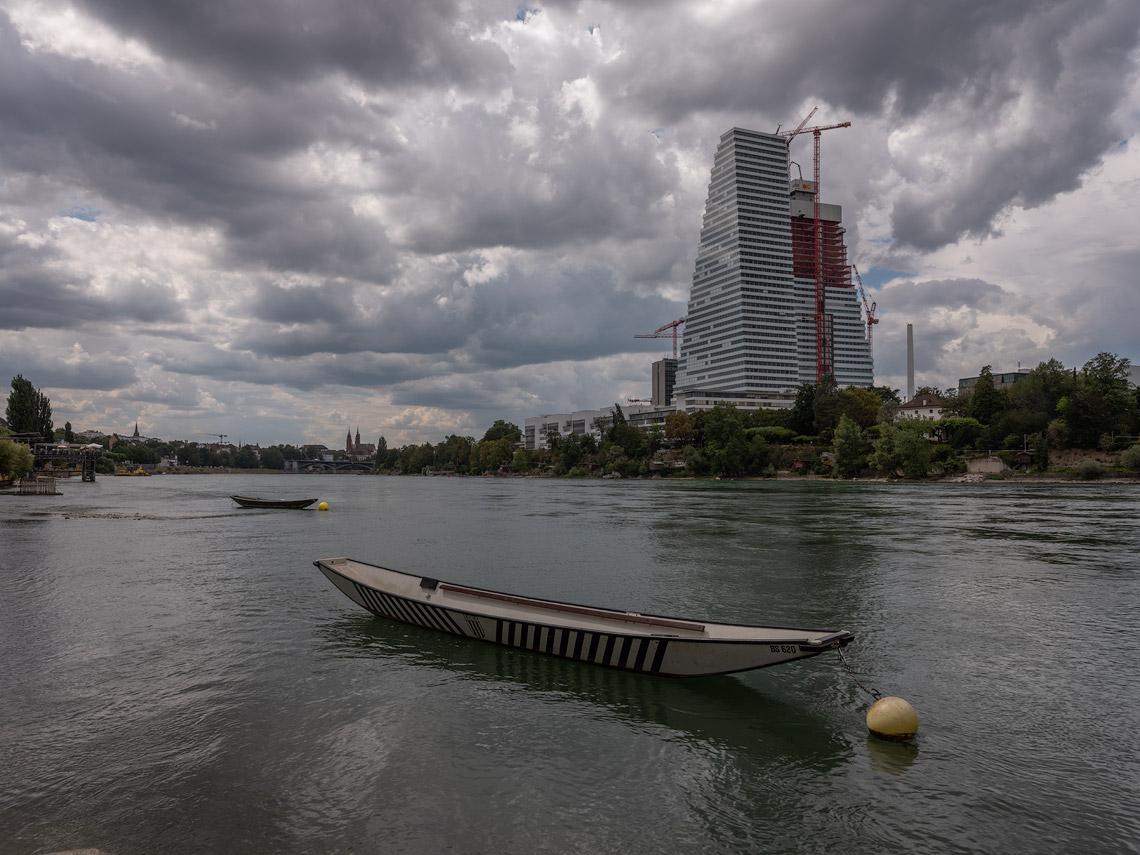
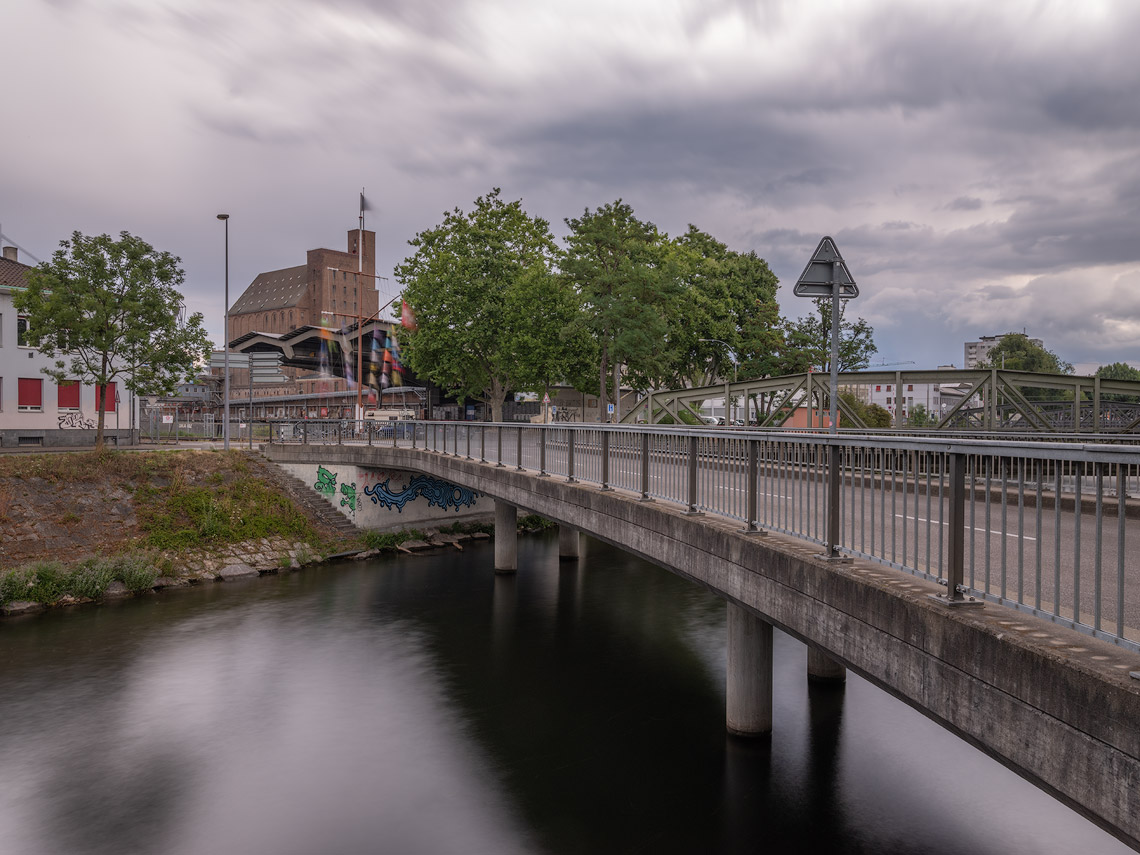
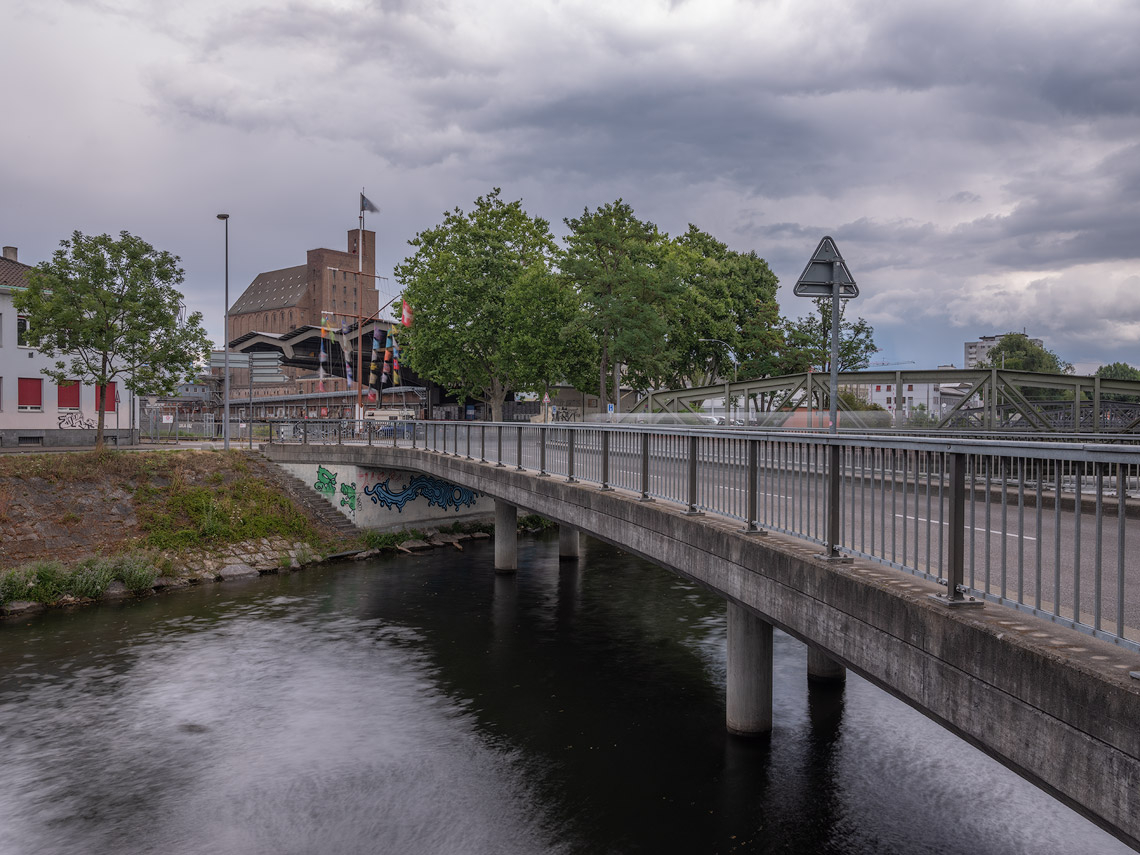
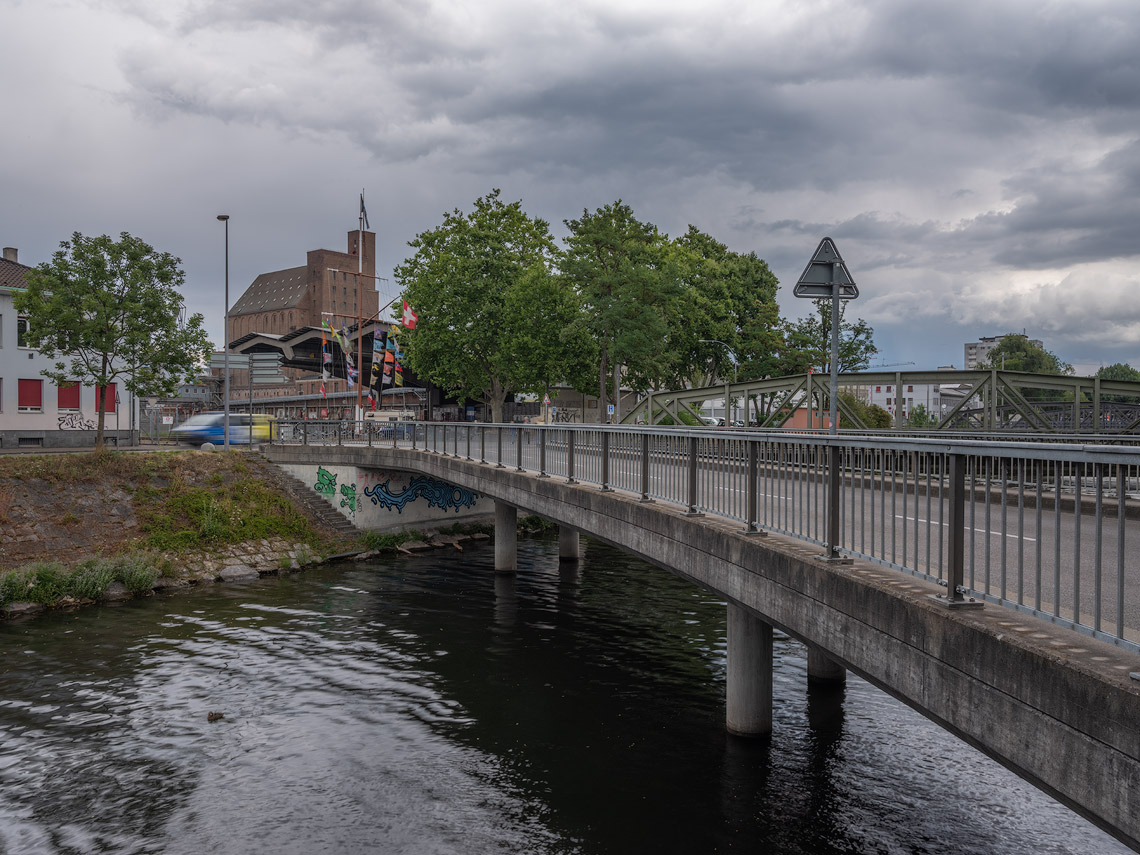
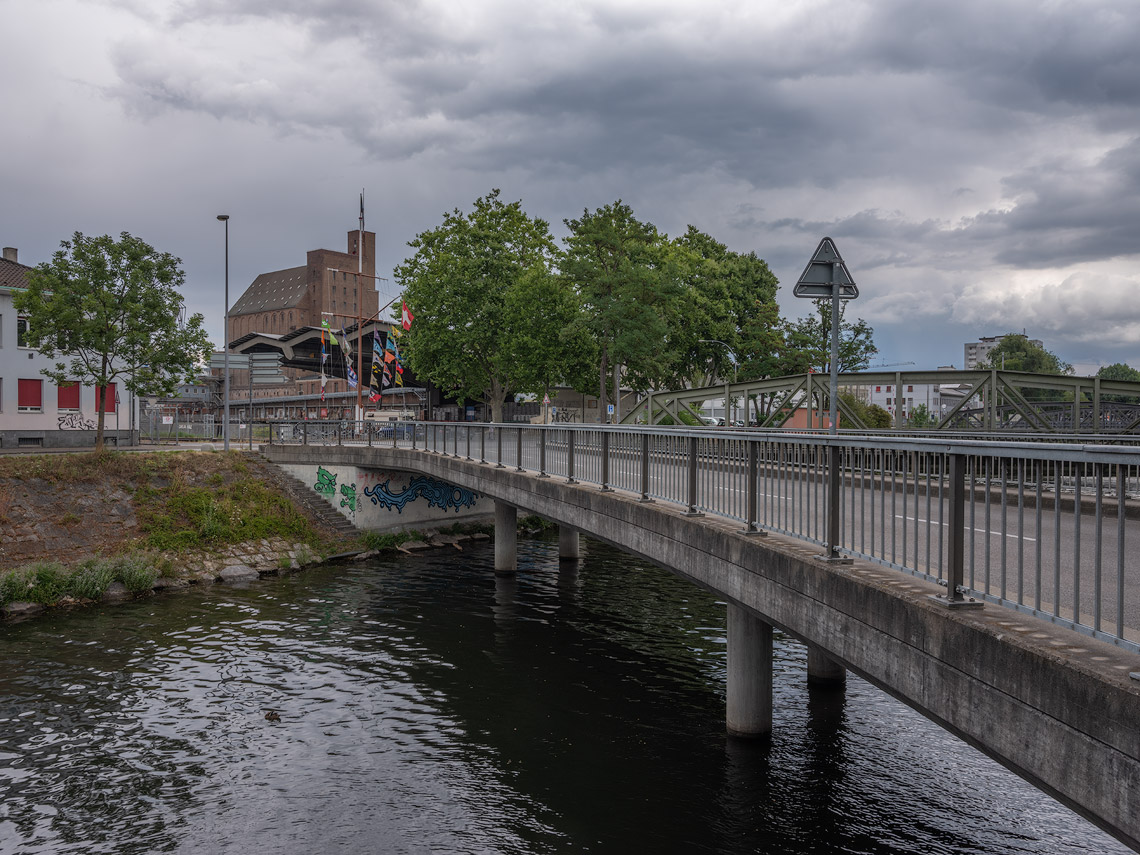
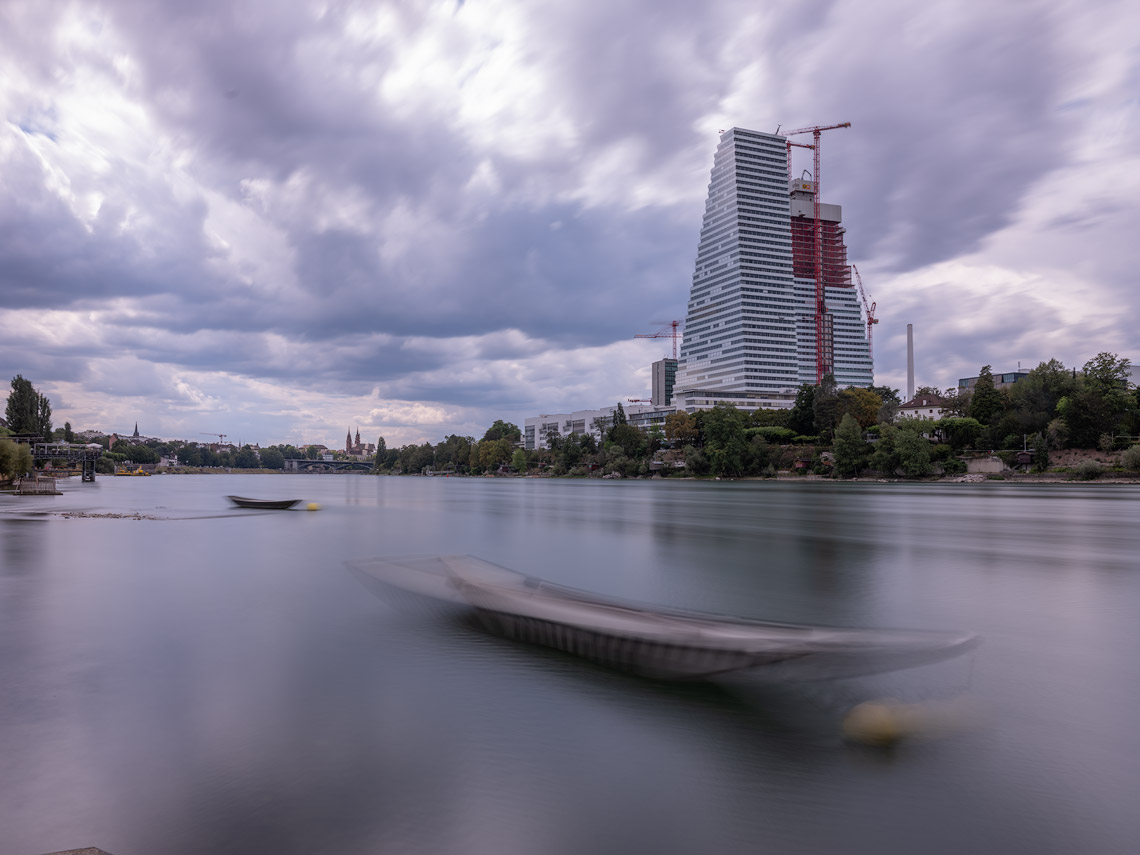
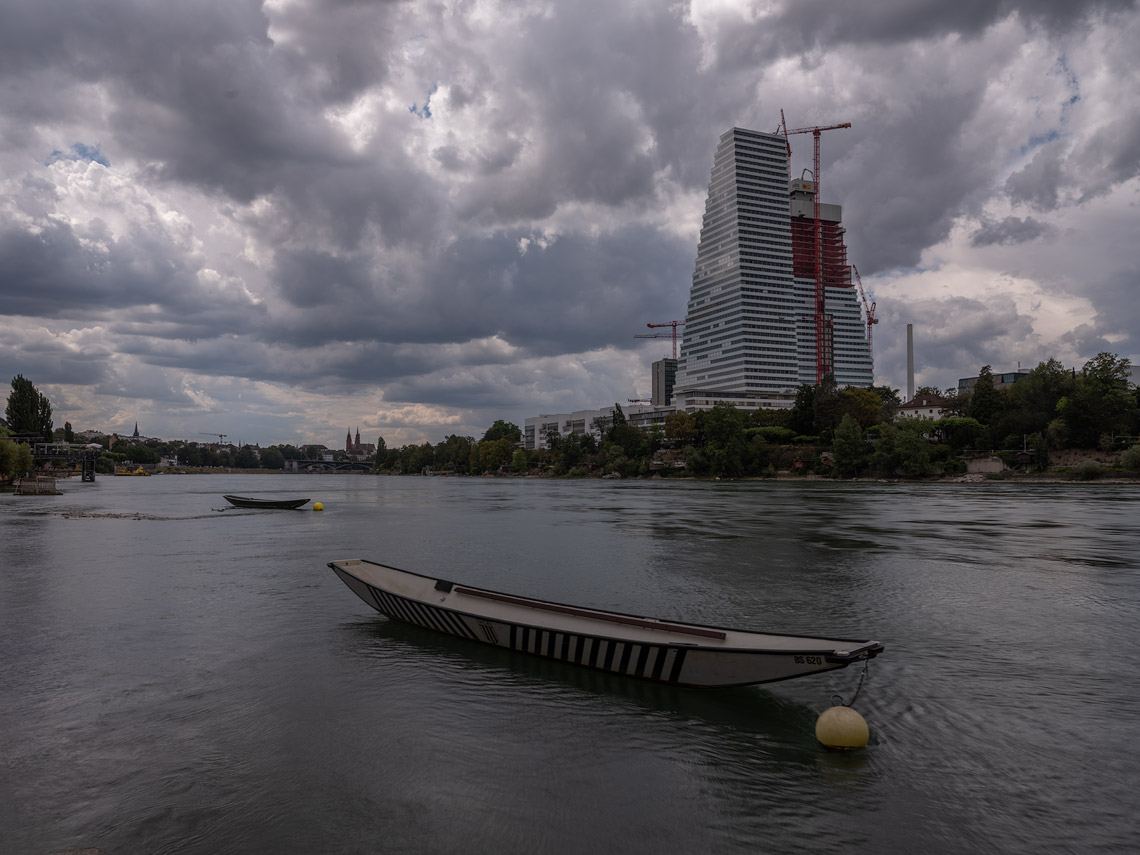
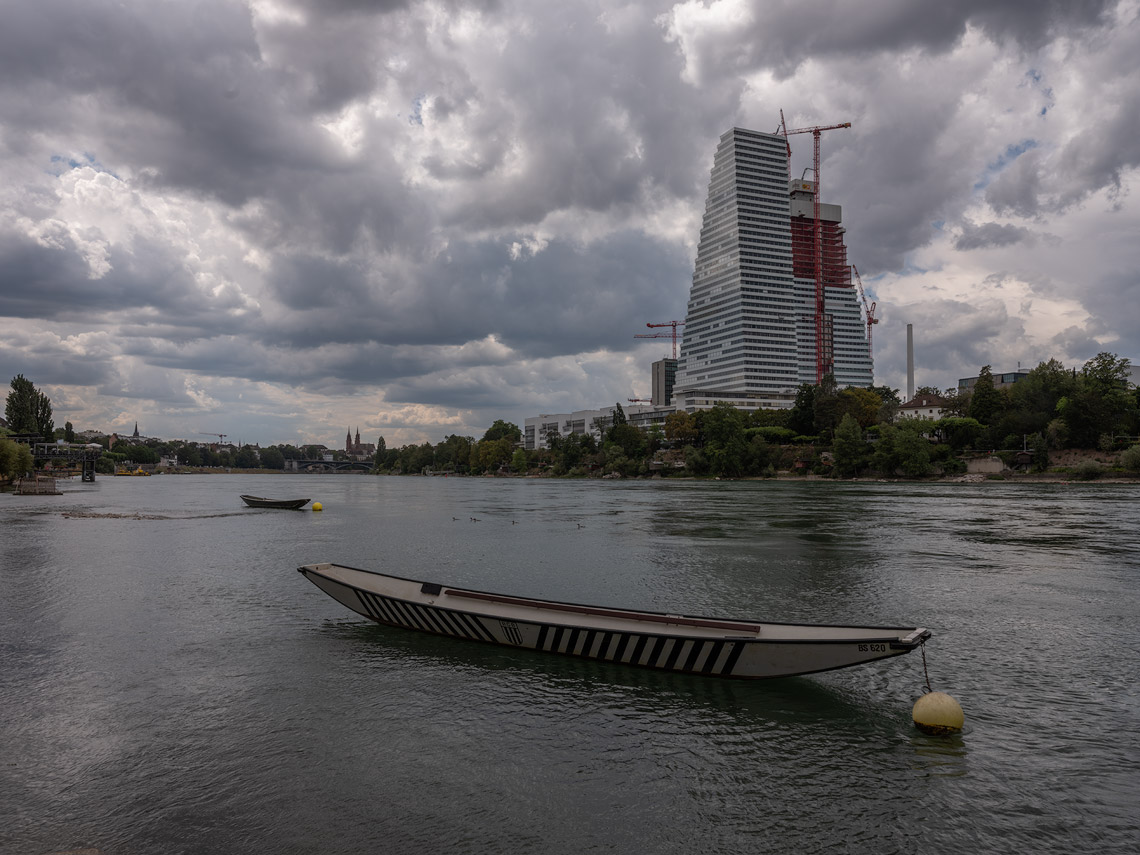
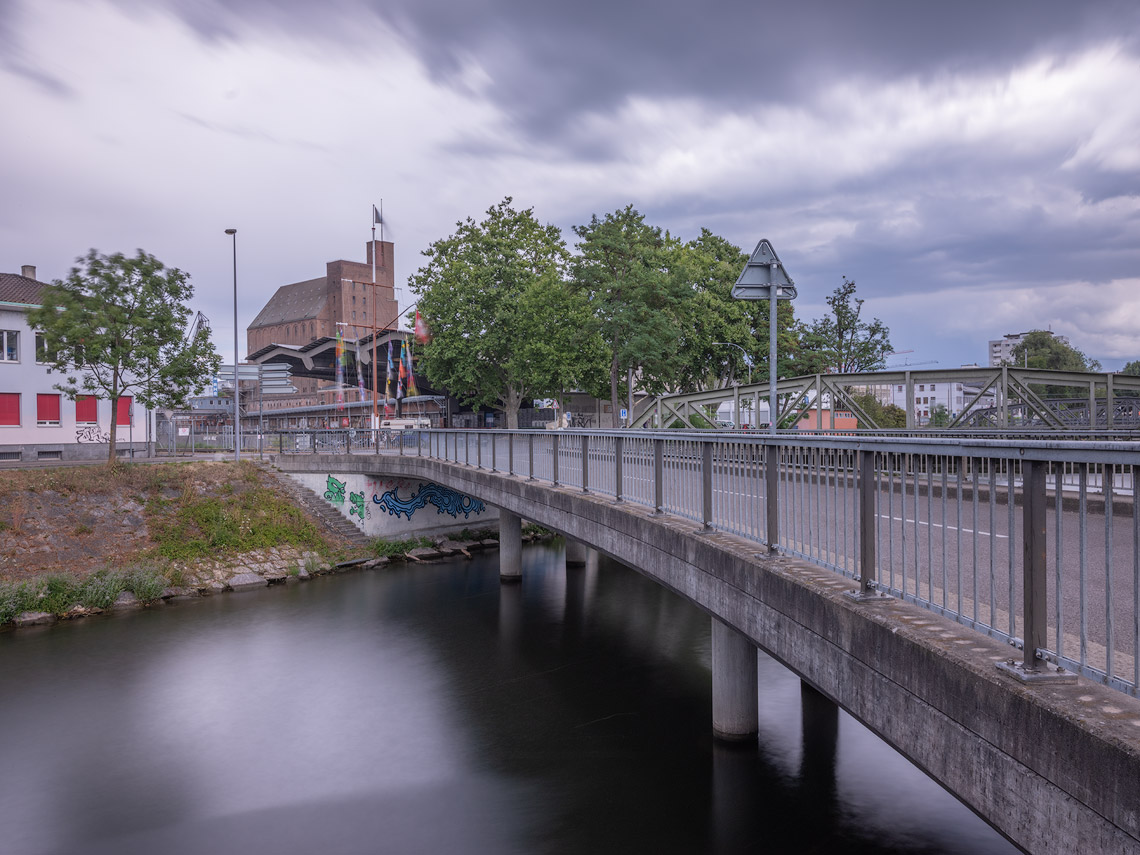
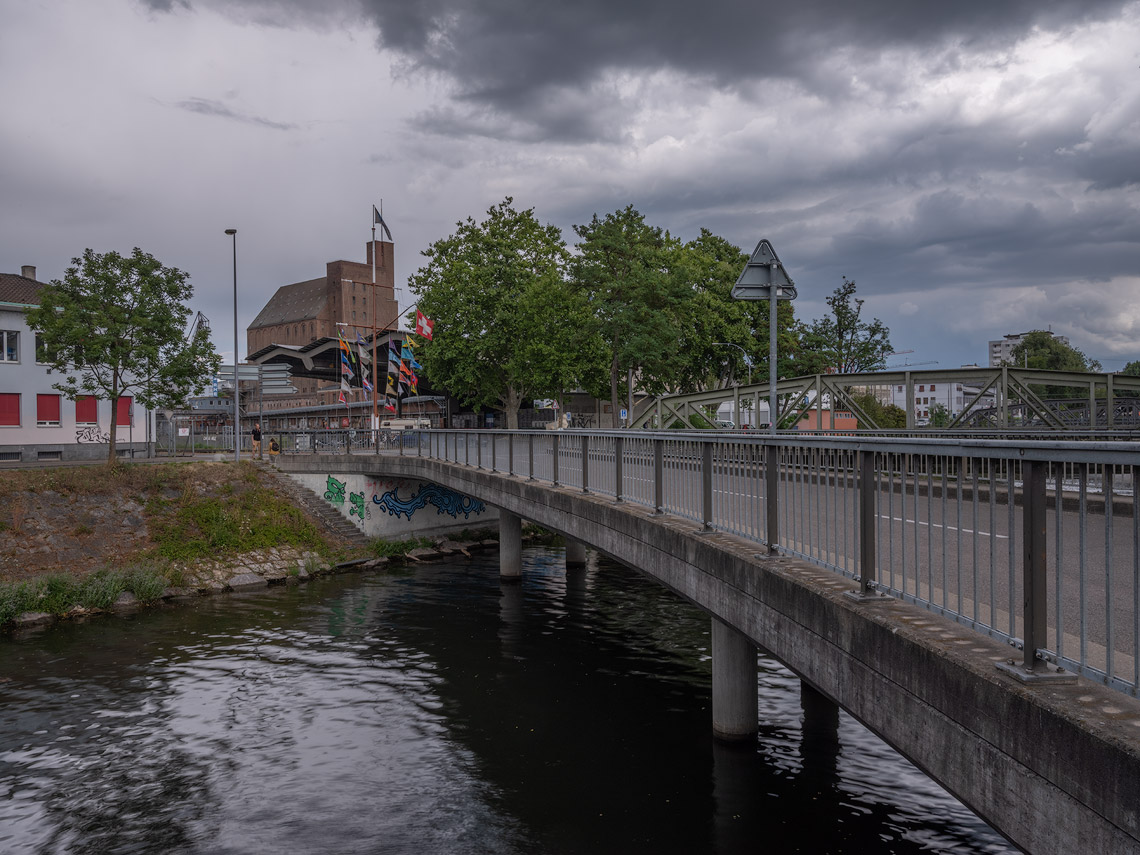
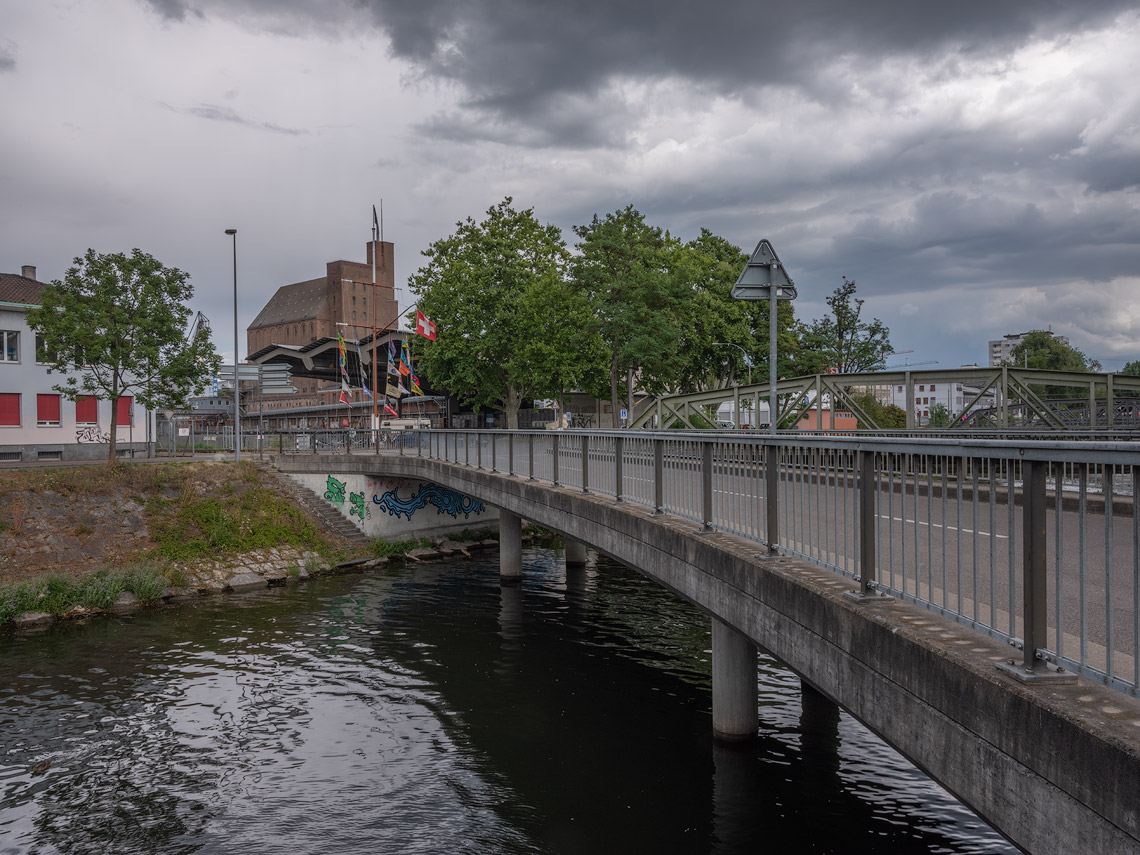
For some readers, raw measurement data alone may be too abstract to allow for a clear practical assessment of the results. That is why, in addition to the laboratory measurements, I also took a series of real-world test shots at a nearby location. These were captured on two different days, featuring different subjects under more or less overcast skies. I chose to work on two separate days because natural light never remains completely constant throughout a test session, and I wanted to avoid any one candidate gaining an advantage—or suffering a disadvantage—simply because of a particular lighting situation.
All images were taken using an identical white balance setting of 5800 Kelvin and were exposed consistently according to each filter’s nominal filter factor. This means that, in addition to any colour shift, it is also possible to identify a tendency to deviate from the stated filter factor. I also measured these deviations in the laboratory and summarised them in a table, which you will find below.
Before placing the comparison images into the various sliders, I processed them only moderately: highlights were reduced and shadows slightly lifted. Colour settings, sharpening controls, and any other adjustments that could have been made in Lightroom were left untouched. In the end, this resulted in 15 comparison images for each of the two field tests.
A Few Notes on the Evaluation
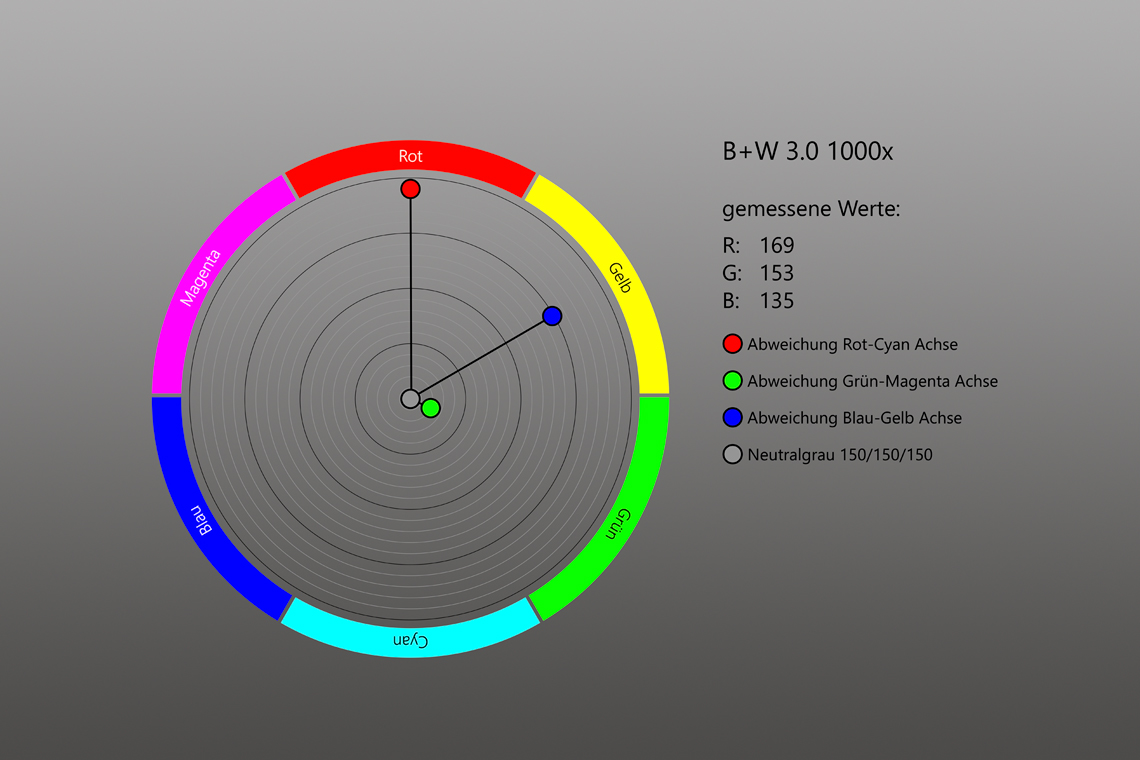
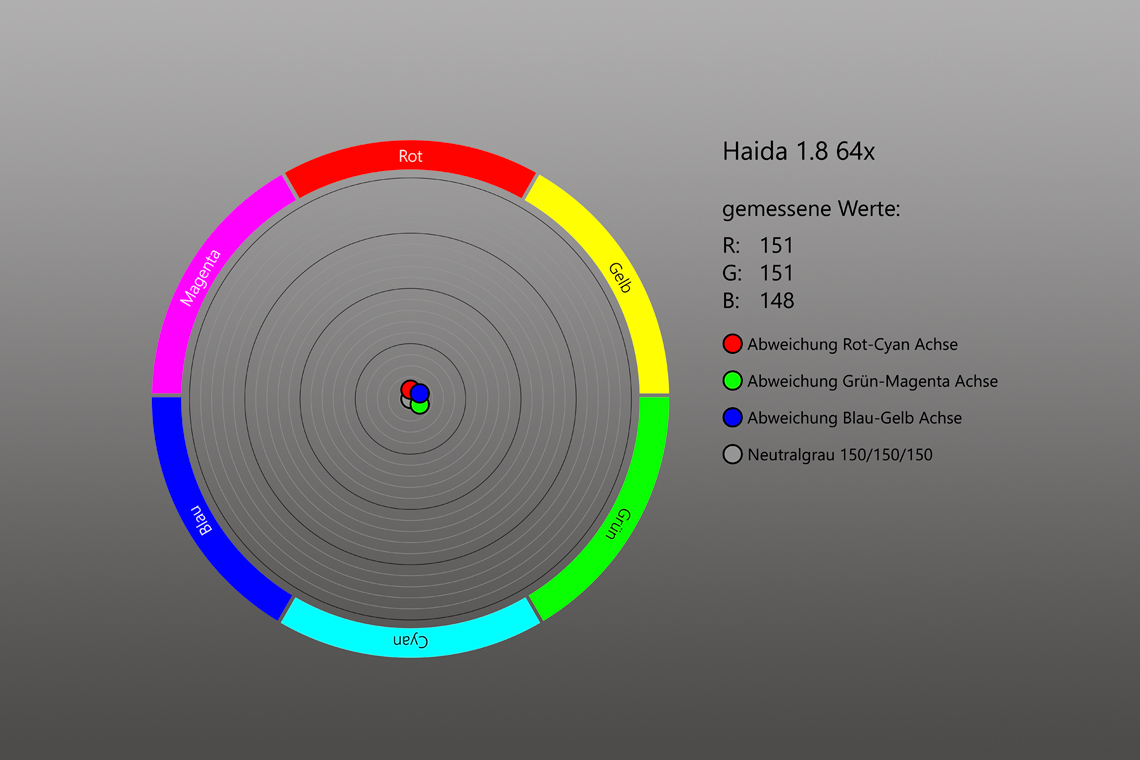
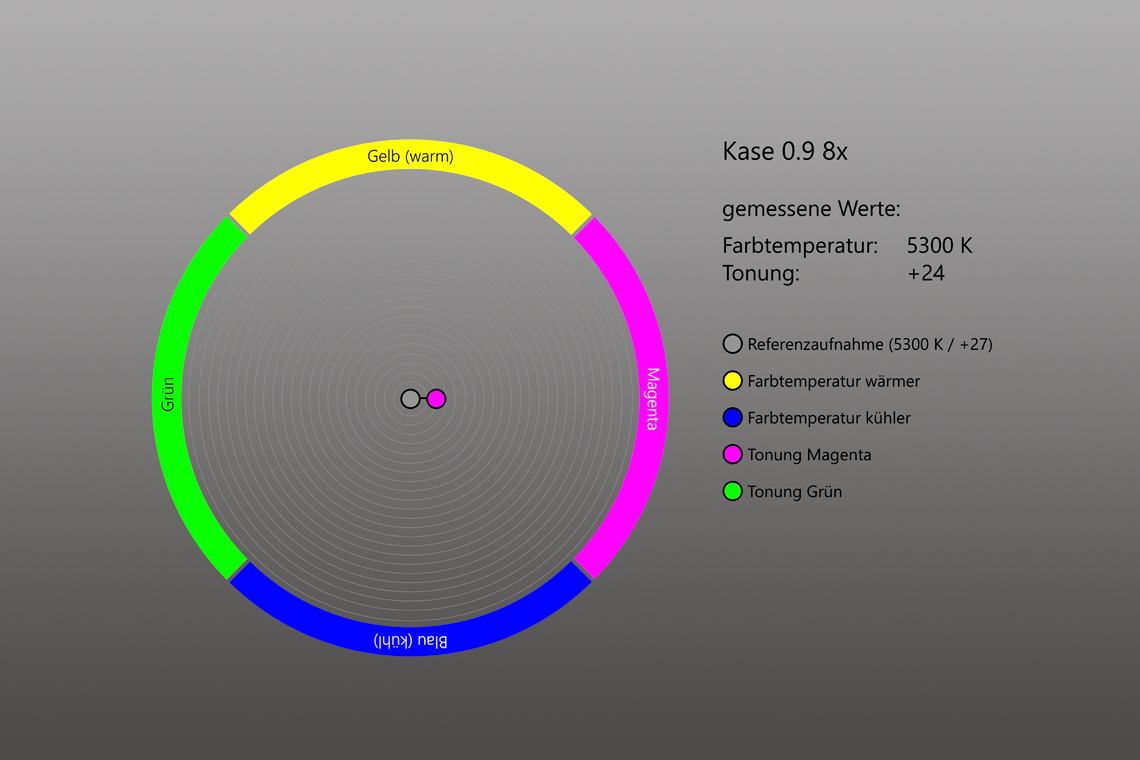
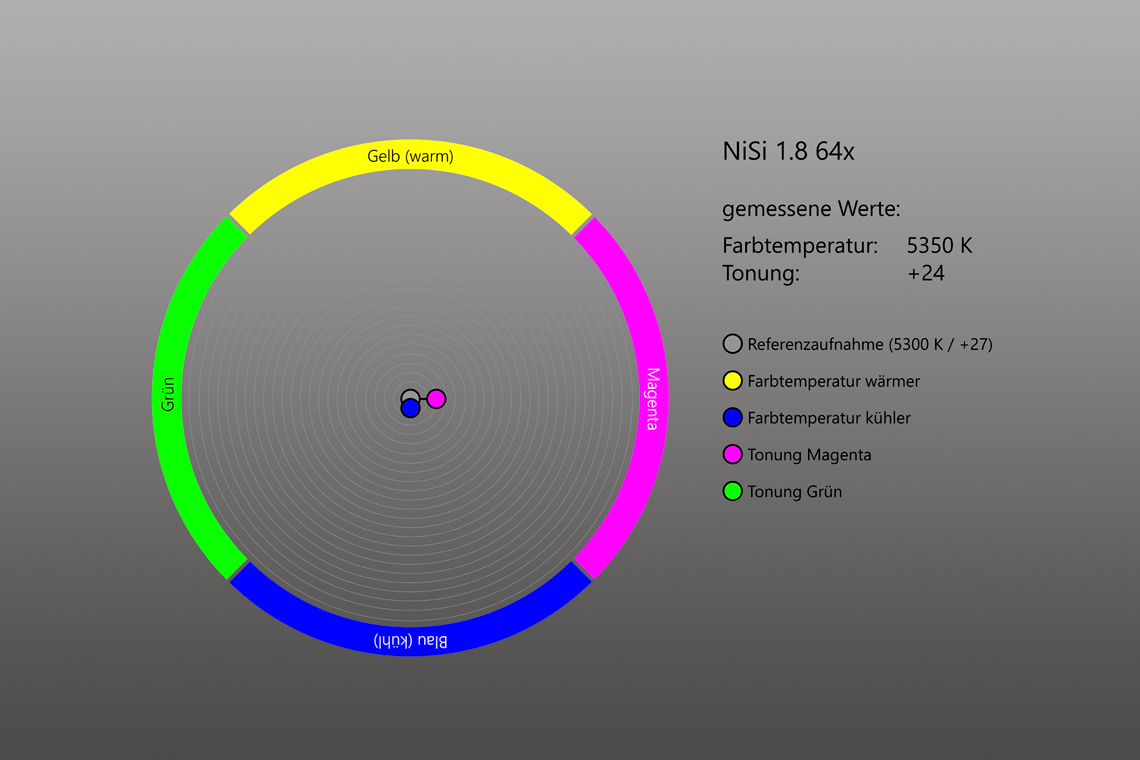
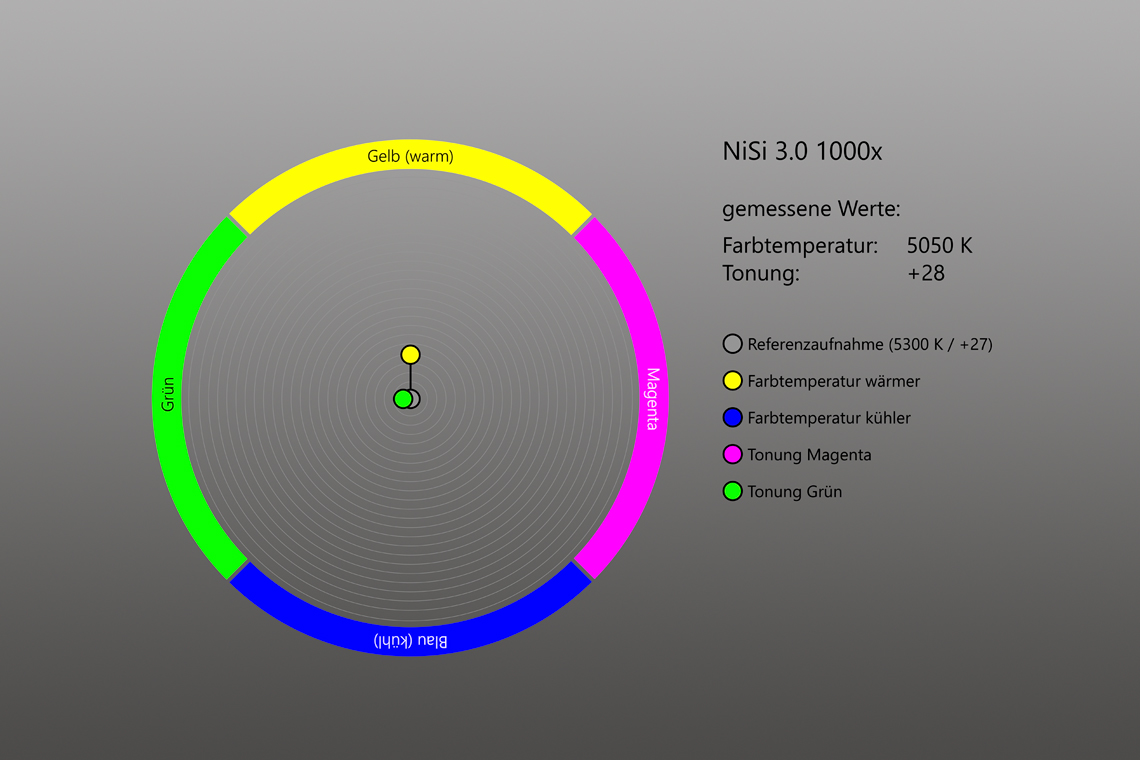
I determined colour shift in two different ways: first by analysing the primary colour channels red, green and blue (RGB), and second by measuring deviations along the yellow–blue and green–magenta axes, i.e. temperature and tint. For some readers, these values may be easier to relate to, since deviations in RAW processing can often be corrected more intuitively using the temperature and tint sliders rather than by adjusting the individual colour channels.
For the RGB measurements, I created both a reference image and a filtered image. I first corrected the reference image in Lightroom using the White Balance Selector on the ColorChecker. I then repeated the same process with the filtered image until the colour and brightness reading on the grey patch reached 150 / 150 / 150. After that, I applied the resulting temperature and tint values to the filtered image, opened both files in Photoshop, and measured the deviation on the 18% grey patch using the eyedropper tool with an 11 × 11 pixel sample area. Ideally, this process should produce a neutral value of 150 in each channel. Values above 150 indicate a shift towards red, green, or blue, while values below 150 indicate a shift towards cyan, magenta, or yellow.
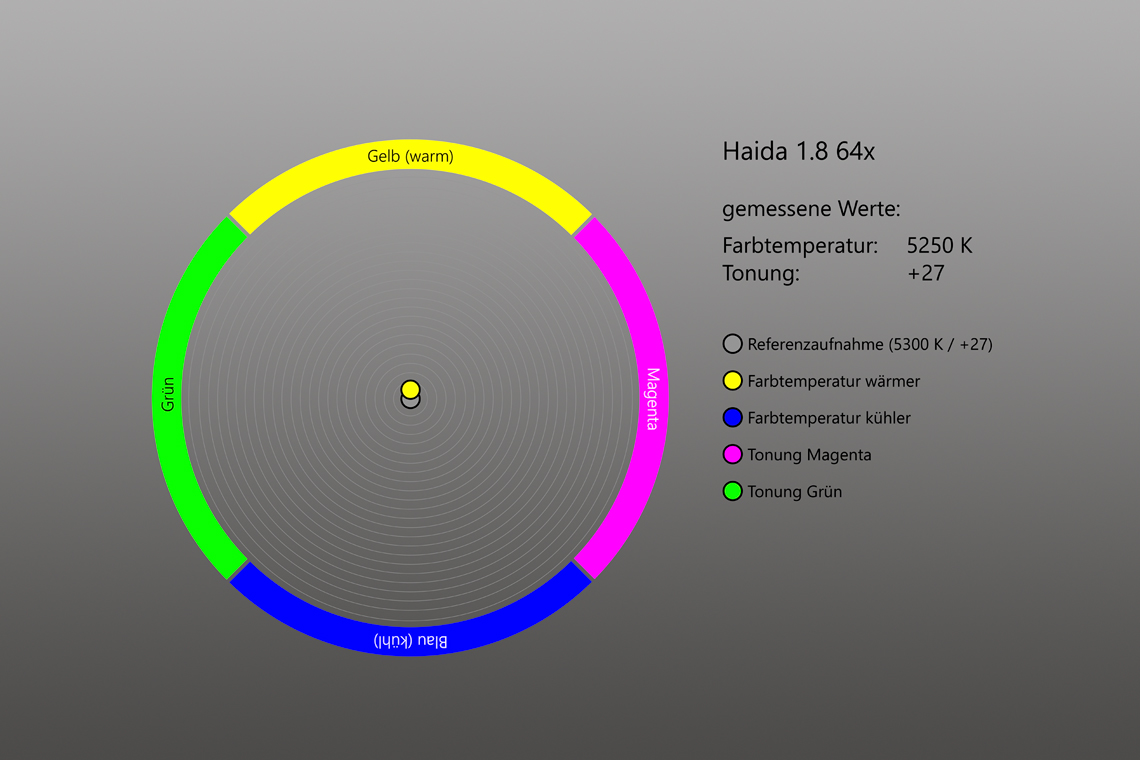
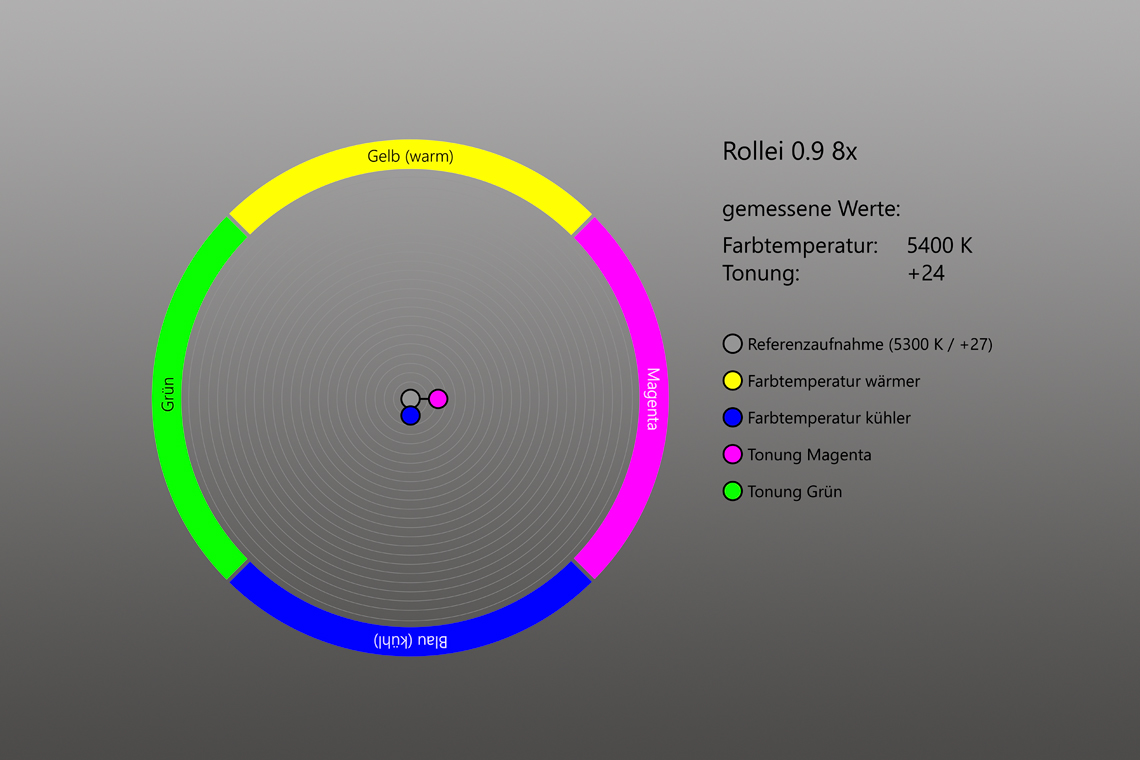
Measuring colour temperature and tint was comparatively straightforward. Here, I only had to correct the 18% grey patch of the ColorChecker in Lightroom. If the resulting temperature value was lower than that of the reference image, this indicated a correspondingly warmer colour shift; if it was higher, the shift was cooler. Likewise, tint values above the reference indicated an additional shift towards green, whereas lower values pointed to a shift towards magenta.
Part 1: Comparison Within Each Product Line
Measurement Results: B+W
The B+W ND filters behaved largely as I had expected. The ND 0.9 proved to be completely colour-neutral, while the ND 1.8 showed a slightly cooler rendering, with a deviation of around 50 Kelvin. The ND 3.0, however — the “Big Stopper” in this test — displayed a pronounced colour shift. The cast was so obvious that I repeated the measurements several times to rule out any measurement error.
As can be seen in the comparison images, the Big Stopper showed a colour temperature deviation of no less than 1200 Kelvin and a tint shift of 8 points compared with the reference image, resulting in a distinctly orange-red cast. In other words, the B+W Big Stopper from Bad Kreuznach was a clear outlier throughout the entire test series.


Measurement results: Haida
The test results for the Haida round filters were inconspicuous and unsurprising. With the 0.9, no deviations were visible, while the 1.8 showed a slightly warmer color reproduction. The measurement results show that I was right. A difference of 50 Kelvin was measured. With the Big Stopper, the color temperature was exactly right, but there is a visible deviation of four points towards magenta.


Measurement results: Kase
As I already know from Kase’s square filters, the company’s round filters also deliver very neutral overall colour reproduction. With the ND 0.9, I could see no difference in the comparison images, and the measured colour temperature matched the reference exactly; only a minimal tint deviation was recorded. The ND 1.8 was slightly warmer, with a difference of 50 Kelvin, while the ND 3.0 performed at a similarly high level, showing only a 3-point tint deviation compared with its reference.


Measurement results: NiSi
The measured values of the NiSi screw-in filters are on a comparable level to those of Haida and Kase. With the ND 0.9, the colour temperature remained stable, and only a minimal tint deviation of one point was recorded, which was of course not visible in the comparison image. With the ND 1.8, the colours measured 50 Kelvin cooler, accompanied by a tint deviation of three points. Only the ND 3.0 appeared slightly too warm compared with its closest competitors, showing a deviation of 250 Kelvin. However, with a tint difference of just one point, this result should be kept in perspective.


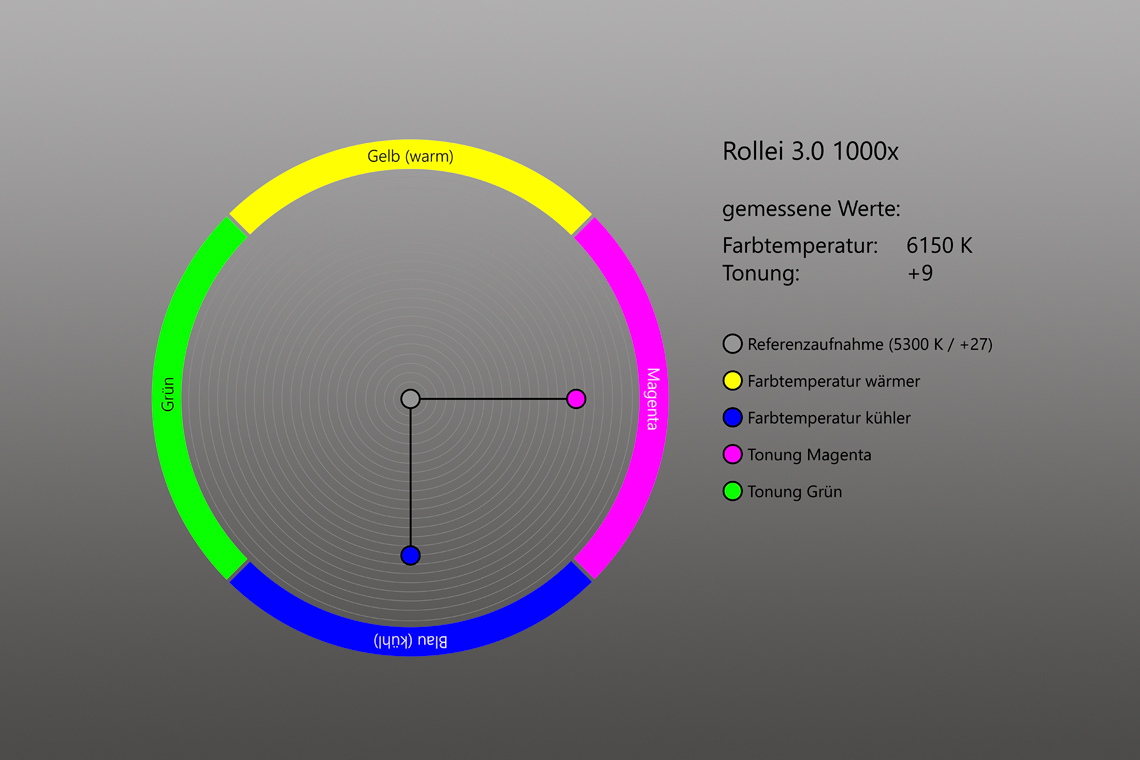
Measurement results: Rollei
Now the last of the five candidates. My measurements showed a more or less noticeable deviation into the blue and magenta channel in all three Rollei filters, which was disappointed to me. With the 0.9, the cast seemed still acceptable with 100 Kelvin and 3 tint points of difference. But already the little stopper’s temperature dropped by a remarkable 400 Kelvin with a significant deviation into the magenta of 9 tint points. The measurement of the ND 1000x showed even more striking values: It deviated from the reference by remarkable 850 Kelvin, with a strong drift of 18 tint points towards magenta. Same as with the B+W 3.0, I had to repeat the measurements several times to be sure, the values were correct. Laboratory measurements and comparative images, however, speak the same language: the cool color cast with a strong portion of magenta cannot be ignored.


Part 2: Comparison Across All Manufacturers
The comparisons so far have clearly shown how the filters behave within each brand and where their respective strengths and weaknesses lie. Naturally, the greater the extension factor, the more demanding colour neutrality becomes — and some of the tested candidates clearly struggled with it.
In the following sliders, the comparison images have been reorganised so that filters of the same strength can be compared directly across all manufacturers. As in the previous section, the sequence begins with the ND 0.9 and continues in ascending order, with each filter accompanied by its corresponding charts.
All Manufacturers: ND 0.9 (8×)
As can be expected from the candidates with 8x lengthening, there are hardly any differences visible between the manufacturers. The deviations are pleasingly marginal. However, there is a phenomenon that I announced, but which has not yet been mentioned: the lengthening factor. More on that below.
All Manufacturers: ND 1.8 (64×)
With the Little Stoppers, the differences become more apparent. The B+W renders slightly cooler, while Haida shows a minimally warmer colour reproduction. Kase and NiSi, by contrast, are virtually neck and neck, although I have the impression that there is a slight hint of magenta in the clouds in the NiSi image. Rollei, on the other hand, falls clearly behind, with the already mentioned magenta shift and its cooler colour rendering.
All Manufacturers: ND 3.0 (1000×)
With the Big Stoppers, the differences are most clearly visible. While Haida, Kase and NiSi still perform well, B+W and Rollei stand out because of their contrasting colour casts. “You would almost have to screw these two filters on top of each other to get a neutral image” was my first thought when looking at the comparison images. Needless to say, I did not put this spontaneous idea into practice — but who knows, it might actually have worked. In any case, it is clear that, in my view, both of these filters still leave room for improvement.
In the case of the B+W filter, the colour cast is at least understandable to a certain degree. These filters have been on the market for more than 20 years, and producing such dense ND filters was undoubtedly a greater challenge at the time than it would be today. Since demand for this type of filter has likely declined steadily over the years, it is quite possible that the dark glass was never fundamentally revised. Even so, I have little doubt that the Schneider Group would be capable of doing so today. After all, the company has produced other high-end optical equipment designed to meet far more demanding technical requirements.
The situation is rather different with Rollei. Its Big Stopper is still a relatively young product, yet it exhibits such a strong blue colour cast that I would be reluctant to mount it on my lens again by choice. It is possible that the result would look different if the camera were allowed to compensate automatically — for instance by using auto white balance — but that is another story. As things stand, I believe Rollei would be well advised to improve this filter if it wants to avoid losing market share.
Part 3: Accuracy of the Filter Factor
In addition to accurate colour reproduction, a second factor is crucial to the technical success of an image: the accuracy of the exposure extension factor. This factor describes by how much the exposure time must be increased in order to achieve the same brightness as an image taken without a filter. It is no secret that this nominal extension factor does not correspond to the actual one in the vast majority of ND filters. As a result, if you rely on a standard ND app, a conventional exposure table, or a simple exposure-time calculation, the final image may turn out slightly brighter or darker than expected. In most cases, this is manageable and can easily be corrected afterwards in the RAW converter. However, if you are working at the ETTR limit and use an ND filter whose actual extension factor is lower than its nominal value, you may end up with clipped highlights in the image.
In a further series of laboratory tests, I wanted to quantify this deviation more precisely. To do so, I produced identical images with and without the filter, matched to exactly the same brightness, and then compared the resulting exposure times with my exposure chart. This is a very time-consuming process if one wants to carry it out rigorously — especially when aiming for accuracy to two decimal places. All test images were taken at a longer focal length, and only the image centre was used for the measurements. This is essential in order to avoid measurement errors caused by vignetting, and it is worth bearing in mind for anyone intending to determine these values for their own filters.
In all the years I have worked with filters, I have never come across a single one whose printed extension factor matched the measured value with complete accuracy. In this test, however, one filter achieved exactly that for the first time. Naturally, every manufacturer strives for perfection, but this appears to be easier said than done. Even so, accuracy has improved significantly over the years. To avoid making this article unnecessarily long, I have chosen not to include a visual comparison of the brightness differences — everyone knows what an underexposed or overexposed image looks like. Instead, the measured values are summarised in the table below.

Among the 8× ND filters, the Rollei ND 0.9 showed the largest deviation at +0.20 stops, followed by the B+W at +0.11 stops. The best result of the entire test field was delivered by the NiSi ND 0.9, which matched its nominal value exactly with a deviation of 0.00 stops. Haida and Kase also performed very well, with deviations of +0.06 and −0.02 stops respectively.
The deviations among the Little Stoppers were also relatively small. The NiSi showed the largest discrepancy at −0.25 stops, while Rollei followed at +0.13 stops. The best result in this group was achieved by the Kase ND 1.8, with a deviation of just −0.03 stops.
The best overall average in the entire test field was delivered by Kase’s three ND filters. With deviations of −0.02, −0.03 and +0.02 stops, they achieved an impressively small average deviation of just 0.07 stops. At the other end of the scale was Rollei, whose filters came close to a full stop of brightness deviation on average. B+W also delivered a rather disappointing average result, largely due to the ND 3.0.
The Relevance of Colour Neutrality and Filter Factor Accuracy
One can certainly debate how much colour shift and exposure extension accuracy should influence a purchasing decision. Colour casts can usually be corrected with a single click in Lightroom, and brightness deviations can often be compensated for during RAW processing. Nevertheless, hardly anyone carries a grey card into the field and includes it in every image, and there is often no neutral grey area in the scene that could be used for correction. Nor does every photographer work in RAW. These are good reasons to choose the most neutral ND filters from the outset and to avoid unnecessary additional effort in post-processing.
The situation is quite similar when it comes to the exposure extension factor. Brightness corrections in JPEGs, as a compressed final format, inevitably lead to a loss of quality. RAW photographers can usually compensate for such deviations without much difficulty, but as mentioned above, caution is required with filters whose actual extension factor is shorter than the nominal one. This mainly affects photographers who work very precisely in order to extract the maximum image quality from their sensor and therefore expose their RAW files as far to the right as possible (ETTR). That is why I measure every new ND filter and enter the correct extension factor in my exposure chart. If you would like to do the same, I explain the procedure in a separate blog post. Alternatively, if you prefer a more modern workflow, you can simply enter the measured deviation into a mobile app such as ND Calc2.
Final Thoughts
If you know a filter’s weaknesses, you can still achieve very good results with most of them. Personally, however, I prefer not to have to think about correction strategies while taking photographs. For that reason, I would generally recommend choosing those filters that showed no clearly negative characteristics in the test. I would also avoid mixing ND filters from different manufacturers, as this can result in inconsistent colour rendering across a portfolio — a slight green cast from one brand, cooler tones from another, and a magenta shift from a third.
Since I already use Kase square filters and have been very satisfied with them, my personal preference would naturally be to stay with Kase. This is due not only to their excellent colour fidelity, but also to the shock resistance of the Wolverine series and the durability of the multi-coating, which has never let me down over the years. Even so, I do not want to give the impression that Kase is the only strong option: other manufacturers also offer filters with very good colour consistency and high-quality coatings.
The tested Kase round filter kit has one particularly strong feature: its magnetic adapter ring, which allows round filters to be attached quickly and effortlessly. For me, this system is simply brilliant for two reasons. First, changing a filter takes less than a second. With screw-in filters from other manufacturers, by contrast, the process costs time and patience, and there is always the risk of dropping the filter while unscrewing it. During my tests, I always had to secure the filter with one hand while turning it with the other. Even when working carefully, I occasionally touched the glass unintentionally. I would not want to imagine doing this in difficult conditions — at a waterfall in the rain, for example, or in fleeting, spectacular light in Iceland, when the last thing you want to deal with is fiddly technical handling.
With Kase’s magnetic system, it takes only a quick grip with three fingers — and the filter is on or off. The system is also complemented by an excellent magnetic lens cap, which allows the adapter ring to remain permanently on the lens. It really is that simple. For the current Kase set, there is also a magnetic polarising filter and a compact artificial-leather pouch with an elegant magnetic clasp, allowing the entire kit to be stored safely. The pouch itself is exceptionally well made, has a very premium feel, and is spacious enough to hold all four filters and, if needed, several adapter rings as well.
If you are interested in Kase’s magnetic round filter kits, you can find them here. Feel free to ask me for a 10% discount voucher.
Transparency Note
The images and measurement data presented in this blog post are specific to the tested products, the equipment used, and the conditions under which the tests were carried out. Measurements of comparable products under different conditions may therefore lead to slightly different results and, consequently, to different conclusions.
I am a brand ambassador for Kase Filters Germany, but this does not prevent me from carrying out independent tests. All photographic work and measurements for this article were carried out consistently and with due care. Nevertheless, this blog post naturally also reflects my personal opinions, experience and assessments.