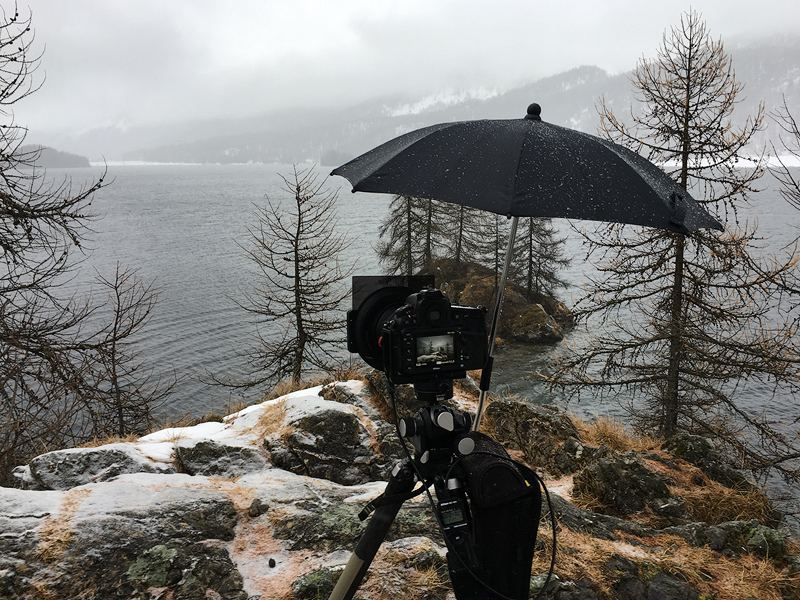
Which landscape photographer has never thought before about protecting his equipment with an umbrella for photographers? A few years ago I developed a small project from these thoughts, which I finally put into practice. I was thrilled (and still am) with the result, but was often looked incredulous at because of this umbrella. When it rained, however, it was me who smiled back and continued taking photos while the others had to pack up their equipment. Long exposures in particular are difficult to achieve in rainy conditions. After a recent photo tour in Bernese Highlands in Switzerland, I was asked from various people about how to recrate such a tripod umbrella. That was a good opportunity to report in a blog post about it. With this guide I’ll show you how to recreate such an umbrella and how to mount it at your tripod. Further I tell you witch components I used to build it up.
Of course there are already some umbrellas for photographers on the market. So I’m not the inventor. But none of these various prefabricated so called solutions convinced me. And everyone of my friends knows if a piece of equipment doesn’t exist it will be adapted until it fits perfectly into my equipment.
The search for the right umbrella
My search for a usable item started with related products. For instance umbrella systems for baby buggies, golf caddies and even walking frames. But these accessories were often either very heavy too, or bulky, inflexible and waggly. Anyone who does not have to wear his umbrella does not watch the weight. In addition, I simply could’t find find any suitable holder for the tube diameter of my tripod. After all, in terms of the usability of baby buggy umbrellas matched closely to what I could imagine on my tripod. It was a starting point. A potential umbrella should be a high quality item, light weighted and furthermore easy to mount. In addition, on one hand its surface should protect the camera and lens from rain in a sufficient way but not offer to much space for wind on the other hand. The squaring of a circle in a way. Will it be possible to put all that a single “umbrella”?
At first I bought a Chicco stroller parasol. I found it in a big department store around the corner. For my purposes the holder seemed almost dauntingly chunky, but the umbrella surface size itself was opaque, color-neutral and had good UV protection. The diameter of 70 cm also suited my needs. I was particularly impressed by the two hinges, one just below the slider and another right above the bracket. Thanks to the upper hinge, the parasol can be tilted out of the field of view of a wide-angle lens if needed without affecting the angle of the tube. In this way, a lot of different positions can be realized. Over the years of use, I realized the importance of this flexibility in practice.

If I succeed to remove the original clamping device (without destroying the bracket) and replace it with a better one, the result would be great. A high-quality, flexible umbrella that was easy to mount to the tripod and quickly to handle in many situations. What more could I expect? Now I faced the challenge of finding a suitable bracket and then next, to assemble the umbrella’s stick with the front derailleur clamp.
The long way to the perfect clamp
Most of the ambitious landscape photographers own a carbon tripod. Carbon fiber tripods have the invaluable features of light weight and low-vibration. But carbon fiber is as expensive as sensitive. That’s why a clamp is needed that can both, carry the umbrella safely and prevent the tripod from being damaged.

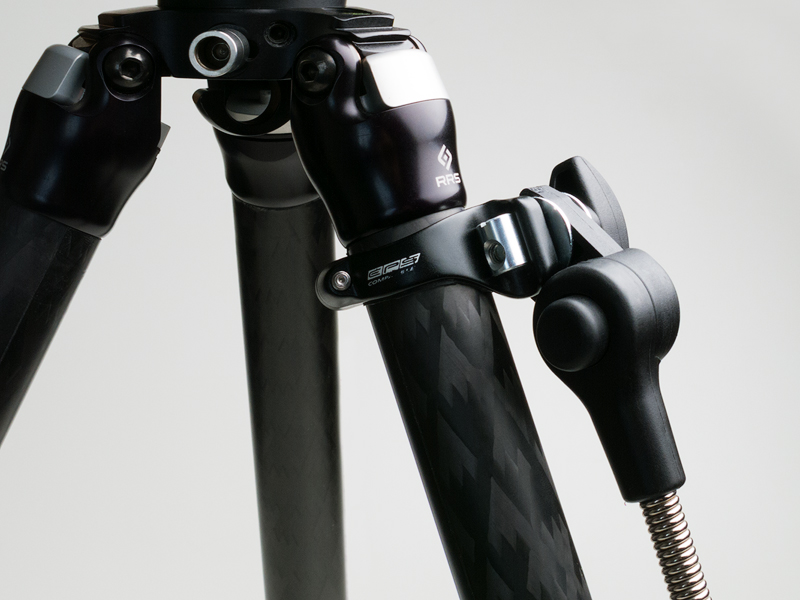
After a very long search in many directions, I finally came across front derailleur clamps for bicycles. Seat tubes of bicycles have fundamental similarities with tripod tubes: they are both round, have comparable diameters and also consist of carbon. That was my approach. Front derailleur clamps must fasten at the seat tube absolutely evenly so that they do not damage seat tubes in any possible way. And that’s why they also fit perfectly for carbon fiber tripods. However, caution is required during assembly. Therefore here the disclaimer: Any replication and use of my umbrella system is at your own risk. In order to avoid any damage, I cut a pad exactly the size of clamp’s inner surface (see picture above). That’s why the clamp hold’s on very tight and won’t scratch the carbon.
Of course it would be too easy if the search was over now. But it seems to be more complicated. Seat tubes of racing bikes have as different diameters as those of tripods. Everybody seem to ploug his own furrow. Whether you’ll succeed or not depends finally oif you capability to find a front derailleur clamp that fits to the diameter of your tripod. So it will take some personal effort to get to the goal.
For my Really Right Stuff TVC-24 L Mark II I use the DC12 clamp made by the Italian high-end manufacturer Campagnolo. It is available in two sizes, 32 mm and 35 mm diameters. Maybe it fits your tripod also. And that would be great. The diameter of my tripod segment measures 33 mm and the 2 mm larger clamp fits perfectly. As already mentioned, a pad can probably help, e.g. cut out from an old piece of a bicycle tube.
If these two main components have been purchased, it’ time for shopping the following items on the list:
- (1+2) 1x Chicco Sun Protection Parasol Black
with UV 50+ Protection - (3) 1x Campagnolo DC12 Front Derailleur Clamp
- (4) 1x Wing Screw D=40 mm M6 x 26
- (5) 3x Washers DIN 125 polyamide
- (6) 2x Fender Washers 6,4 x 25 zinc-plated
- (7) 1x Fender Washers 6,4 x 20 zinc-plated
- (8) 1x Round Nut M6 10 x 14 x 8 zinc-plated

Before you can start the assembly, two things have to be adjusted: First, dissamble the original clamp and remove all its induvidual parts. Start with turning the wing screw counterclockwise until the handle (!) releases from the thread. Contrary to what you would expect, the thread and its square end are made in one piece, so the screw can only be removed turning the wing screw. After doing so you can pull out the thread and dismantle everything as shown in the picture. As the second step, pull away the bulky casing (second picture). In the end there is only the bare swivel left.


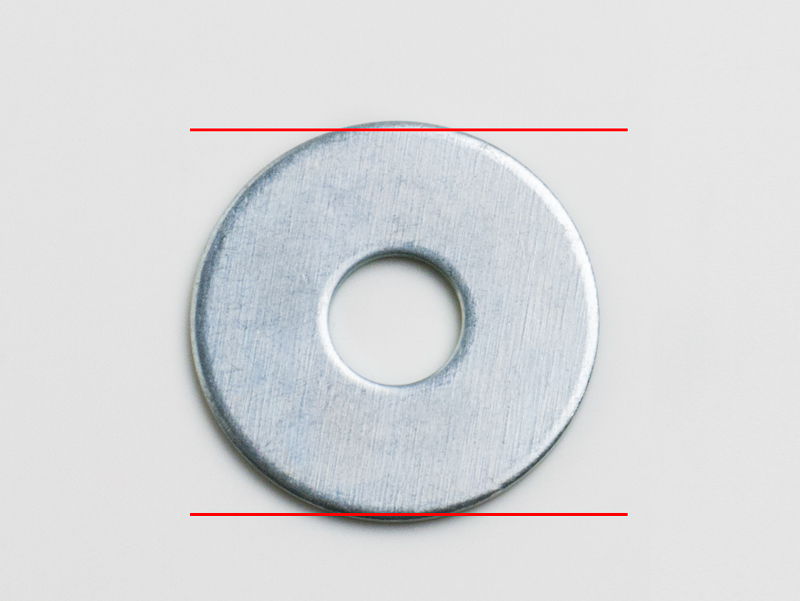
Next, sand down a little at two sides of the fender washer (7) so that it fits perfectly into the vacant recess in the holder. This can easily be done with a rasp while holding the washer with a flat-nose pliers. Alternatively, the washer can also be clamped in a workbench.
The preparatory phase is now complete and the parts are ready for assembly.
The assembly in detail

First you place the grinded fender washer (7) in the space that was freed up by removing the bracket. Then take the wing screw (4) and place a large fender washer (6) over the thread. Next put the thread from behind through the bracket and attach the three polyamide washers (5) to the front. The second fender washer (6) completes the assembly (6) and to finalize it, just put the round nut (8) to the thread. That’s it!

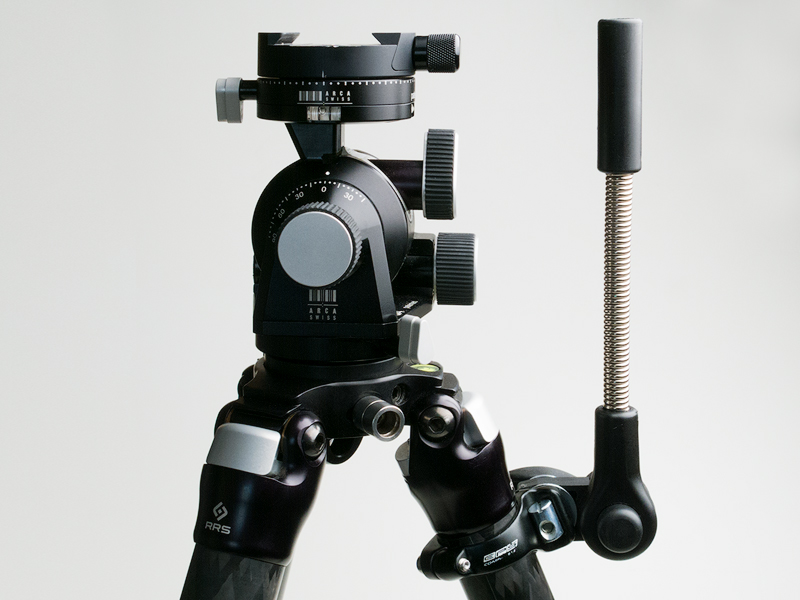
Mounting at the front derailleur clamp
I always keep the holder and umbrella separate in my photo backpack. The mounting clamp remains permanently on the tripod because it’s light and small and therefore isn’t in the way at all when handle the tripod. The mounting of the front derailleurs clamp is very easy and don’t need any further instructions. The bracket will be attached to the clamp in a few simple steps: simply loosen the round nut and take care that you don’t loose any individual parts falling down. Then insert the screw on the clamp’s flat side and turn the wing screw until the round nut is fastened. Then insert the screw on the clamp’s flat side and turn the wing screw until the round nut is fastened. In rain, I often attach the bracket already at home. A little comment on the side: the thread of the wing screw seem to be very tight to fasten the umbrella properly. But don’t worry, the round nut holds the bracket without any problems. If you prefer a longer thread you can get the 41 mm version of the wing screw and cut it to the desired length.
Optional umbrella adjustments
Now the umbrella can be screwed in and start to protect your gear from rain and sun. After using the umbrella for a while, you might think about shorten the umbrella’s stick to your personal preferences. I shortened mine by 80 mm for two reasons: first, I prefer a shorter distance between lens and umbrella. And second, after cutting off a piece, the umbrella fits exactly sideways in my f-stop Lotus. Perfect for my needs.

The shortening is quite easy to do: First cut of the stick carefully to the new length. Then remove the the brass thread from the separated piece. The brass thread can finally inserted in the new stick end and fixed by a light and precise blow of a hammer on to a flat-blade screwdriver. For this post I weighed my umbrella system. It weighs only 369 grams with all its components. I think that’s very good compared to other solutions that you can find on the market.
- Campagnolo DC12 front derailleur clamp 28 g
- Adapted bracket 143 g
- Chicco parasol, shortened 198 g

Final remarks
If you have the endurance to read this guide to the end, you may also be willing to take the effort to recreate this really useful gadget. Because of its rock solid reliable construction, this umbrella will support you on location on every weather front. I really loved my umbrella and I no longer go on tour without it. Thank you for your interest in my blog and good light at all times!
